My First Impressions of Bytebase

Introduction
Bytebase is an open-source database DevOps tool, it's the GitLab for managing databases throughout the application development lifecycle. It offers a web-based workspace for DBAs and Developers to collaborate and manage the database change safely and efficiently. —What is Bytebase
Recently, I have been working on migrating a project's database from SQLite to TiDB Cloud. To facilitate the management of database changes, I decided to use a database DevOps tool and discovered Bytebase. As a new user, I will share my first experience with Bytebase as I tackle the following tasks:
- Install Bytebase on macOS
- Quick start with Bytebase
- Query data and modify schema using the sample data
- Integrate Bytebase with TiDB Cloud
Install Bytebase on macOS
My development environment is:
- macOS 13.2.1 (M1)
- Podman 4.3.1
I tried following the instructions in Install Bytebase with Docker, but an error occurred:
$ docker run --init \
  --name bytebase \
  --platform linux/amd64 \
  --restart always \
  --publish 5678:8080 \
  --health-cmd "curl --fail http://localhost:5678/healthz || exit 1" \
  --health-interval 5m \
  --health-timeout 60s \
  --volume ~/.bytebase/data:/var/opt/bytebase \
  bytebase/bytebase:1.12.1 \
  --data /var/opt/bytebase \
  --port 8080
Error: statfs /Users/user/.bytebase/data: no such file or directory
Due to a known bug #351 with Podman's volume mounting, I modified the command by replacing --volume ~/.bytebase/data:/var/opt/bytebase with --volume bytebase:/var/opt/bytebase:
- Command
- Output
- Log
docker run --init \
--name bytebase \
--platform linux/amd64 \
--restart unless-stopped \
--publish 5678:8080 \
--health-cmd "curl --fail http://localhost:5678/healthz || exit 1" \
--health-interval 5m \
--health-timeout 60s \
--volume bytebase:/var/opt/bytebase \
bytebase/bytebase:1.12.1 \
--data /var/opt/bytebase \
--port 8080
██████╗ ██╗   ██╗████████╗███████╗██████╗  █████╗ ███████╗███████╗
██╔══██╗╚██╗ ██╔╝╚══██╔══╝██╔════╝██╔══██╗██╔══██╗██╔════╝██╔════╝
██████╔╝ ╚████╔╝    ██║   █████╗  ██████╔╝███████║███████╗█████╗
██╔══██╗  ╚██╔╝     ██║   ██╔══╝  ██╔══██╗██╔══██║╚════██║██╔══╝
██████╔╝   ██║      ██║   ███████╗██████╔╝██║  ██║███████║███████╗
╚═════╝    ╚═╝      ╚═╝   ╚══════╝╚═════╝ ╚═╝  ╚═╝╚══════╝╚══════╝

Version 1.12.1 (schema version 1.12.7) has started on port 8080

************* External Visiting URL (--external-url) *************

!!! You have not set --external-url. If you want to make Bytebase
!!! externally accessible, follow:

https://www.bytebase.com/docs/get-started/install/external-url

******************************************************************
INFO	server/server.go:208	-----Config BEGIN-----
INFO	server/server.go:209	mode=prod
INFO	server/server.go:210	dataDir=/var/opt/bytebase
INFO	server/server.go:211	resourceDir=/var/opt/bytebase/resources
INFO	server/server.go:212	externalURL=https://www.bytebase.com/docs/get-started/install/external-url
INFO	server/server.go:213	readonly=false
INFO	server/server.go:214	debug=false
INFO	server/server.go:215	demoName=
INFO	server/server.go:216	disallowSignup=false
INFO	server/server.go:217	backupStorageBackend=LOCAL
INFO	server/server.go:218	backupBucket=
INFO	server/server.go:219	backupRegion=
INFO	server/server.go:220	backupCredentialFile=
INFO	server/server.go:221	-----Config END-------
INFO	mysqlutil/mysqlutil.go:96	Installing MySQL utilities...
INFO	mongoutil/mongoutil.go:52	Installing MongoDB utilities, it may take about several minutes...
INFO	postgres/postgres.go:100	Installing PostgreSQL utilities...
INFO	server/server.go:251	-----Sample Postgres Instance BEGIN-----
INFO	server/server.go:253	sampleDatabasePort=8083
INFO	server/server.go:254	sampleDataDir=/var/opt/bytebase/pgdata-sample
INFO	postgres/postgres.go:223	-----Postgres initdb BEGIN-----
initdb: warning: enabling "trust" authentication for local connections
You can change this by editing pg_hba.conf or using the option -A, or
--auth-local and --auth-host, the next time you run initdb.
INFO	postgres/postgres.go:227	-----Postgres initdb END-----
INFO	server/server.go:258	-----Sample Postgres Instance END-----
INFO	server/server.go:263	-----Embedded Postgres Config BEGIN-----
INFO	server/server.go:264	datastorePort=8082
INFO	server/server.go:265	pgDataDir=/var/opt/bytebase/pgdata
INFO	server/server.go:266	-----Embedded Postgres Config END-----
INFO	postgres/postgres.go:223	-----Postgres initdb BEGIN-----
initdb: warning: enabling "trust" authentication for local connections
You can change this by editing pg_hba.conf or using the option -A, or
--auth-local and --auth-host, the next time you run initdb.
INFO	postgres/postgres.go:227	-----Postgres initdb END-----
INFO	pg/migrate.go:60	Bytebase migration schema not found, creating schema...	{"environment": "", "instance": ""}
INFO	pg/migrate.go:108	Successfully created migration schema.	{"environment": "", "instance": ""}
INFO	store/pg_engine.go:302	Apply database migration if needed...
INFO	store/pg_engine.go:304	The database schema has not been setup.
INFO	store/pg_engine.go:318	The prod cutoff schema version: 1.12.7
INFO	store/pg_engine.go:378	Completed database initial migration with version 1.12.7.
INFO	store/pg_engine.go:157	Current schema version after migration: 1.12.7
Bytebase has been successfully installed and is now up and running.
To access Bytebase, navigate to http://localhost:5678 and set up an admin account.

Then, click Sign up, and the Bytebase dashboard is displayed.

Quick start with Bytebase
To quickly get started with Bytebase, you can follow the Quickstart guide.
View an issue
On the Issues page, you can approve an issue, leave a comment, or cancel it.

Visit projects
On the Projects page, you can view all existing projects or create a new one.

To get detailed information about the Sample Project, you can click SAM and go to its overview page.

Visit environments
On the Environments page, you can manage the existing environment (Test and Prod by default) or create a new one.

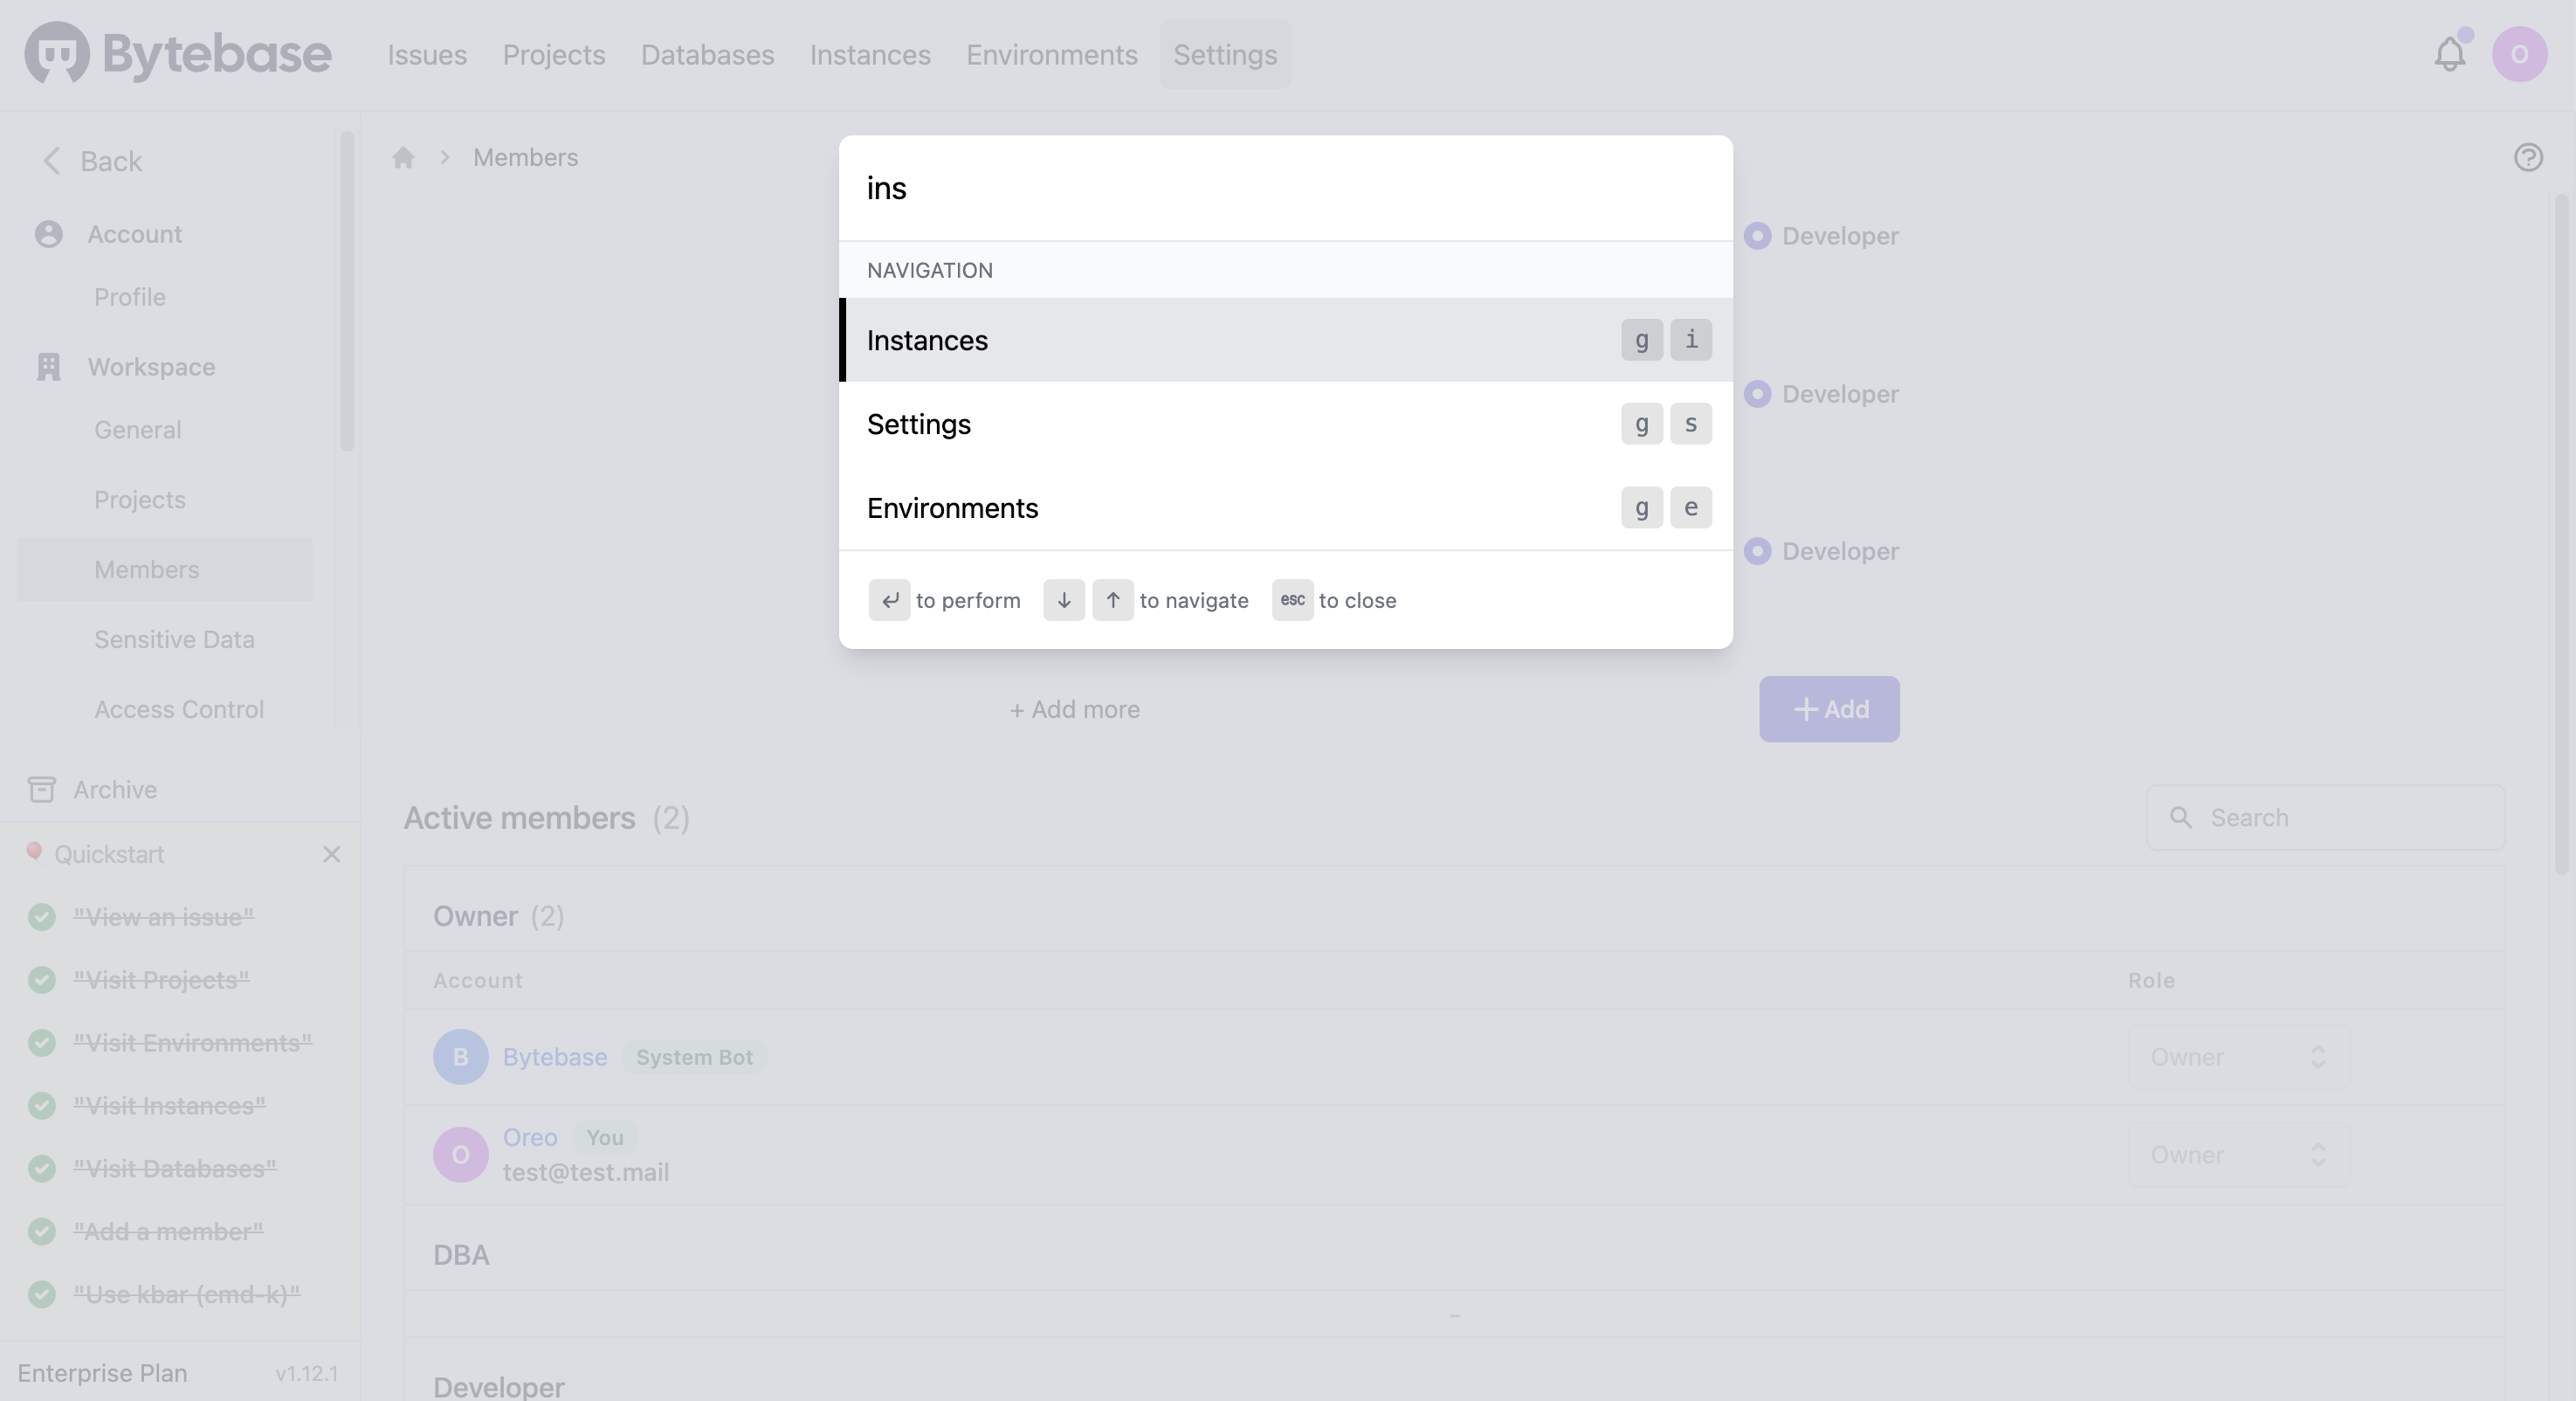
Visit instances
On the Instances page, you can manage the existing instances or add a new one.
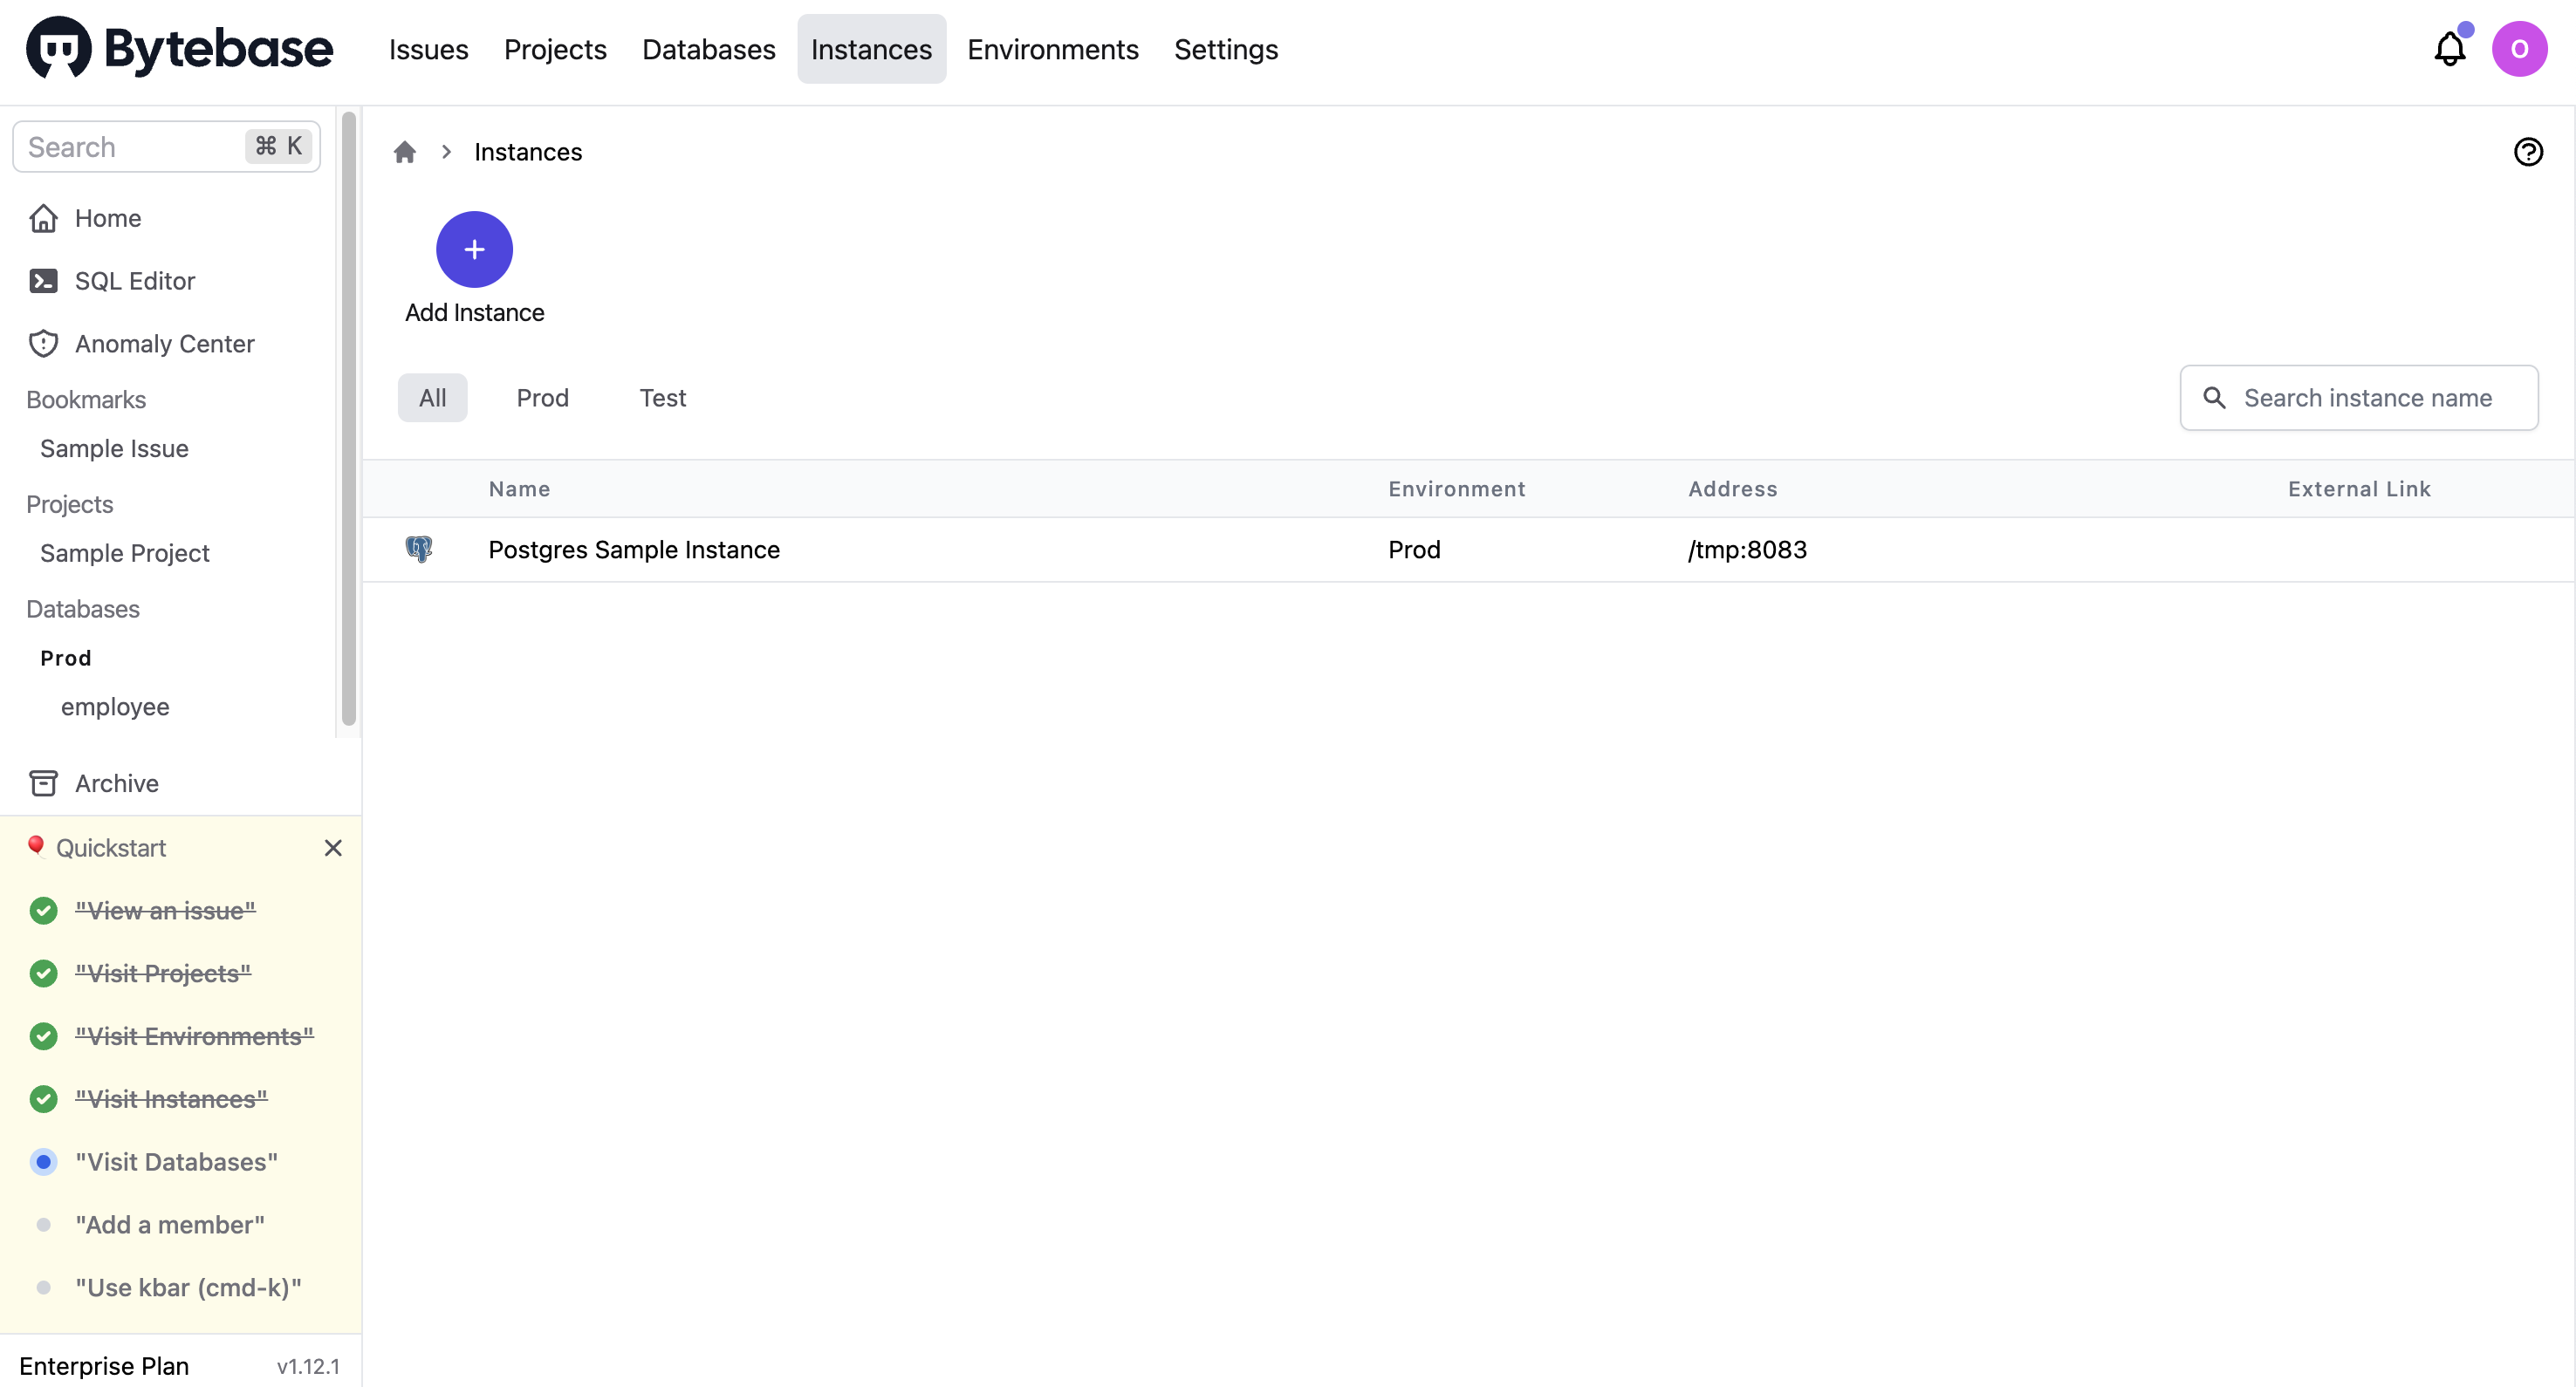
For each instance, you can configure an admin user and a read-only user.
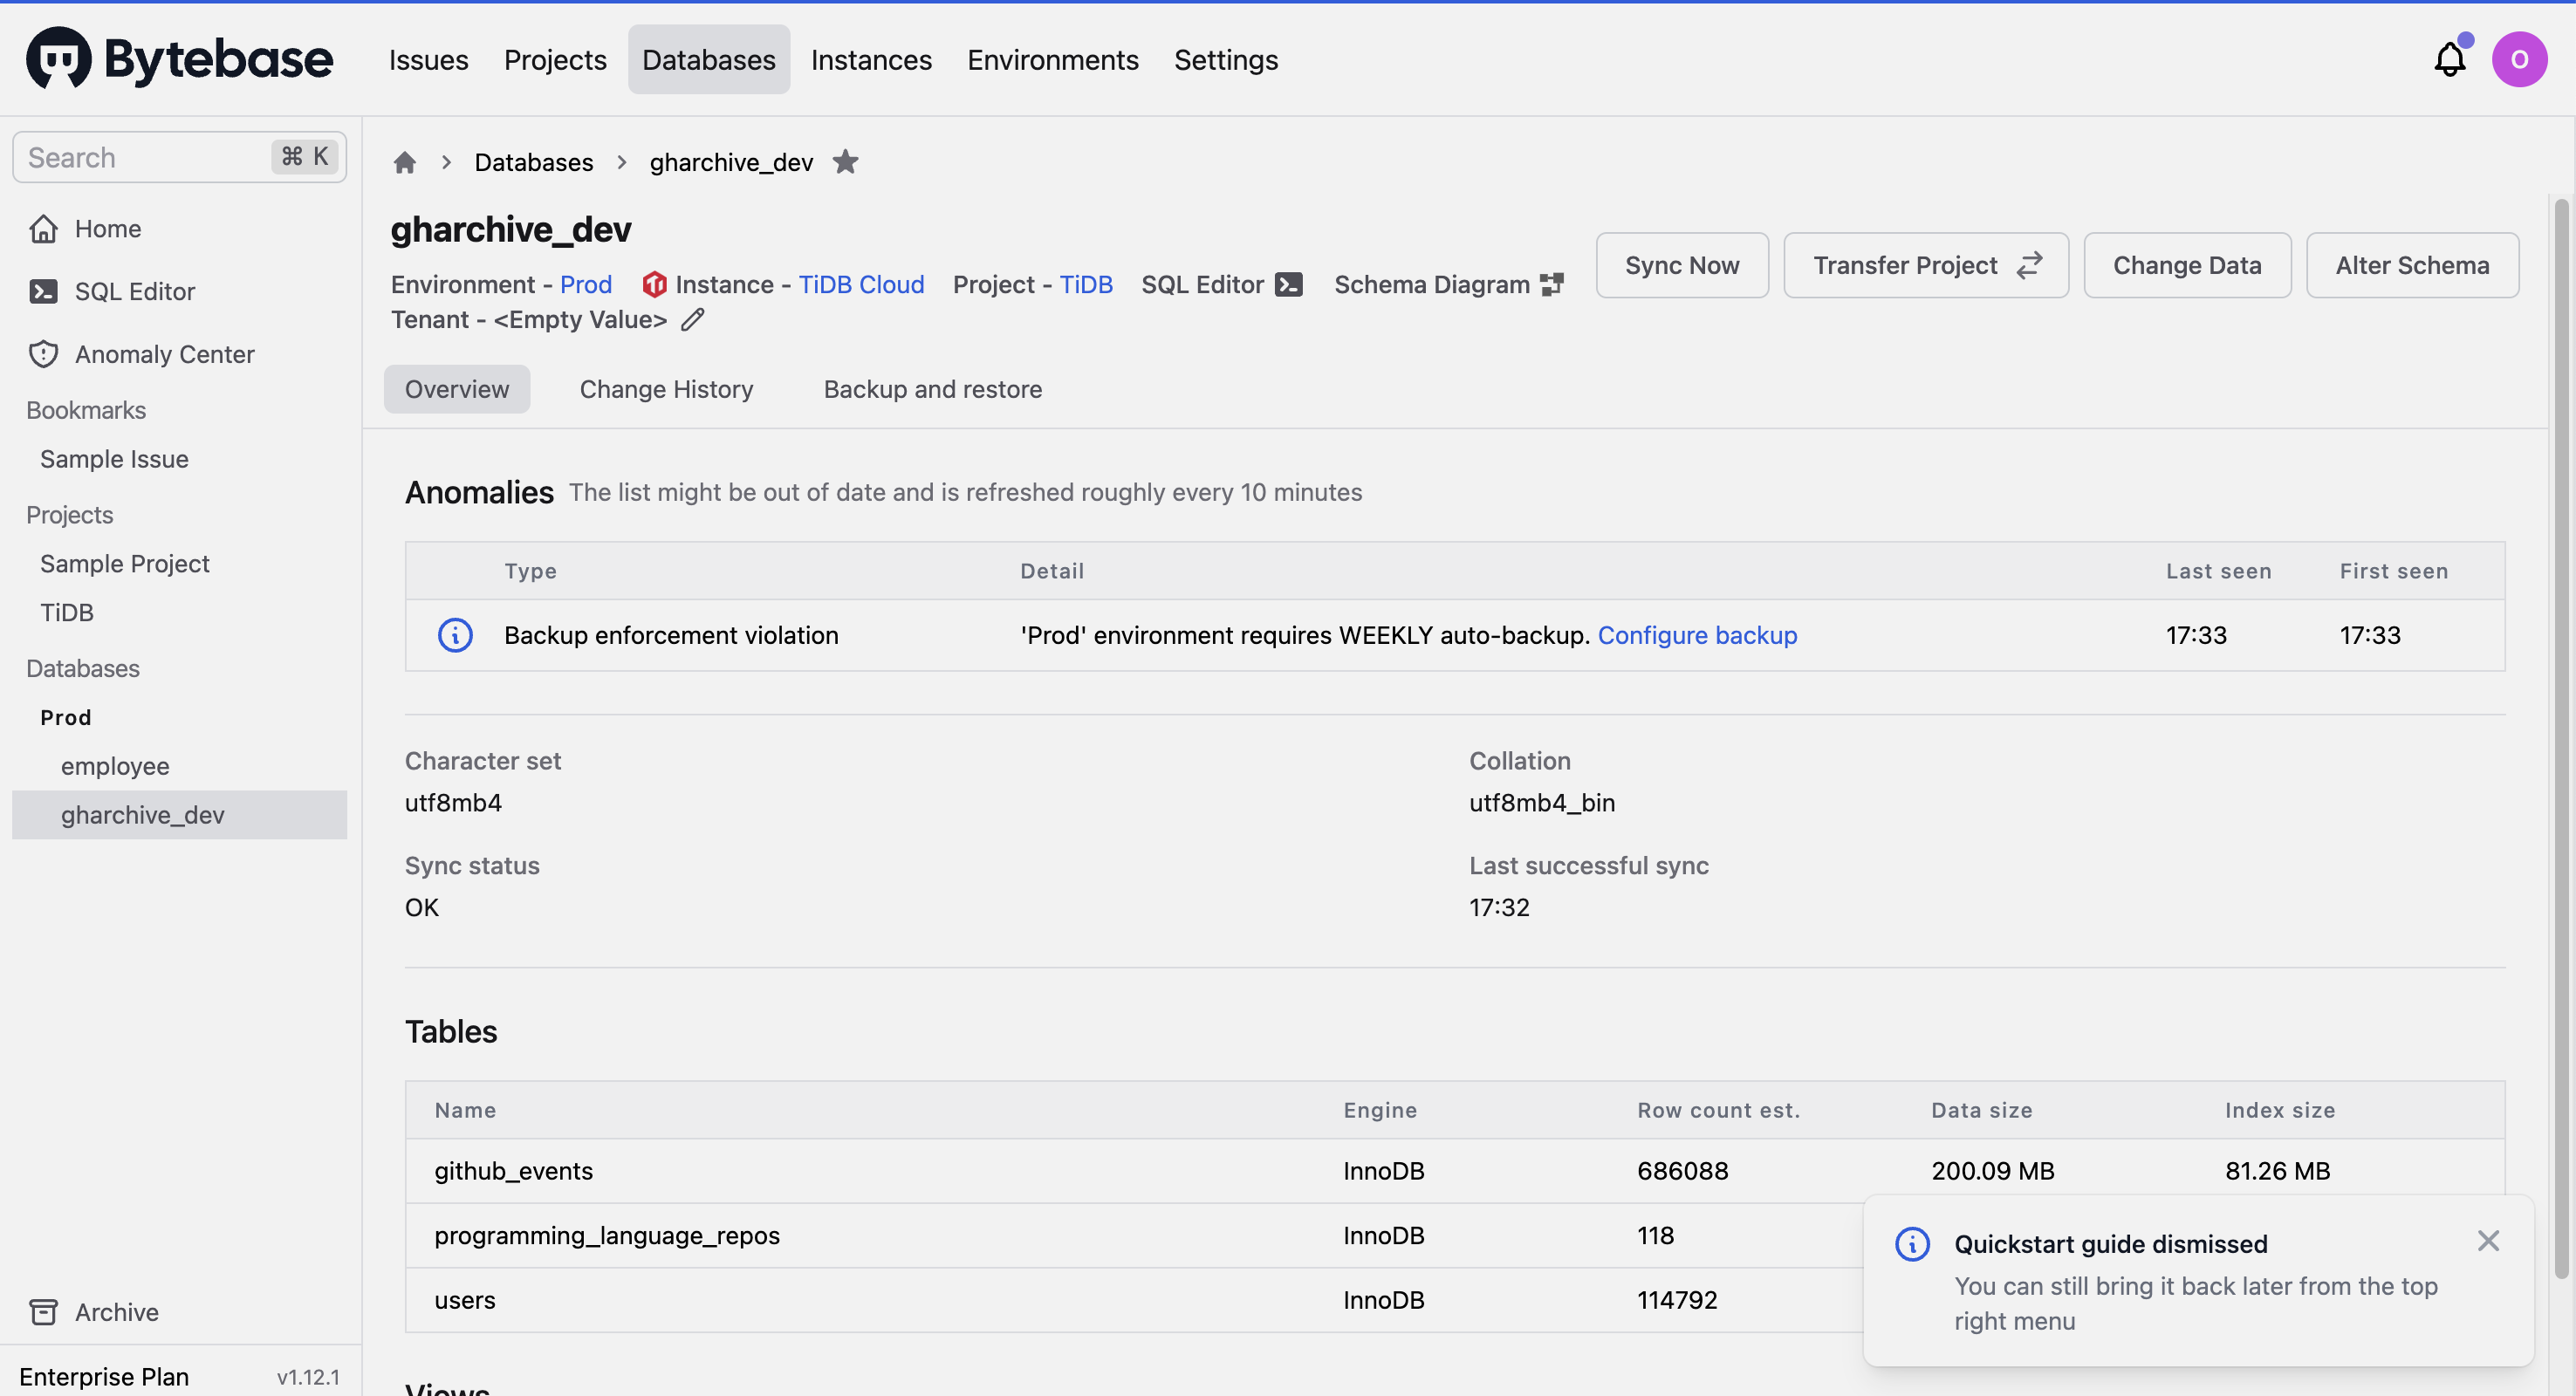
Visit databases
On the Databases page, you can manage the existing databases (Alter Schema, or Change Data) or add a new database (New DB).
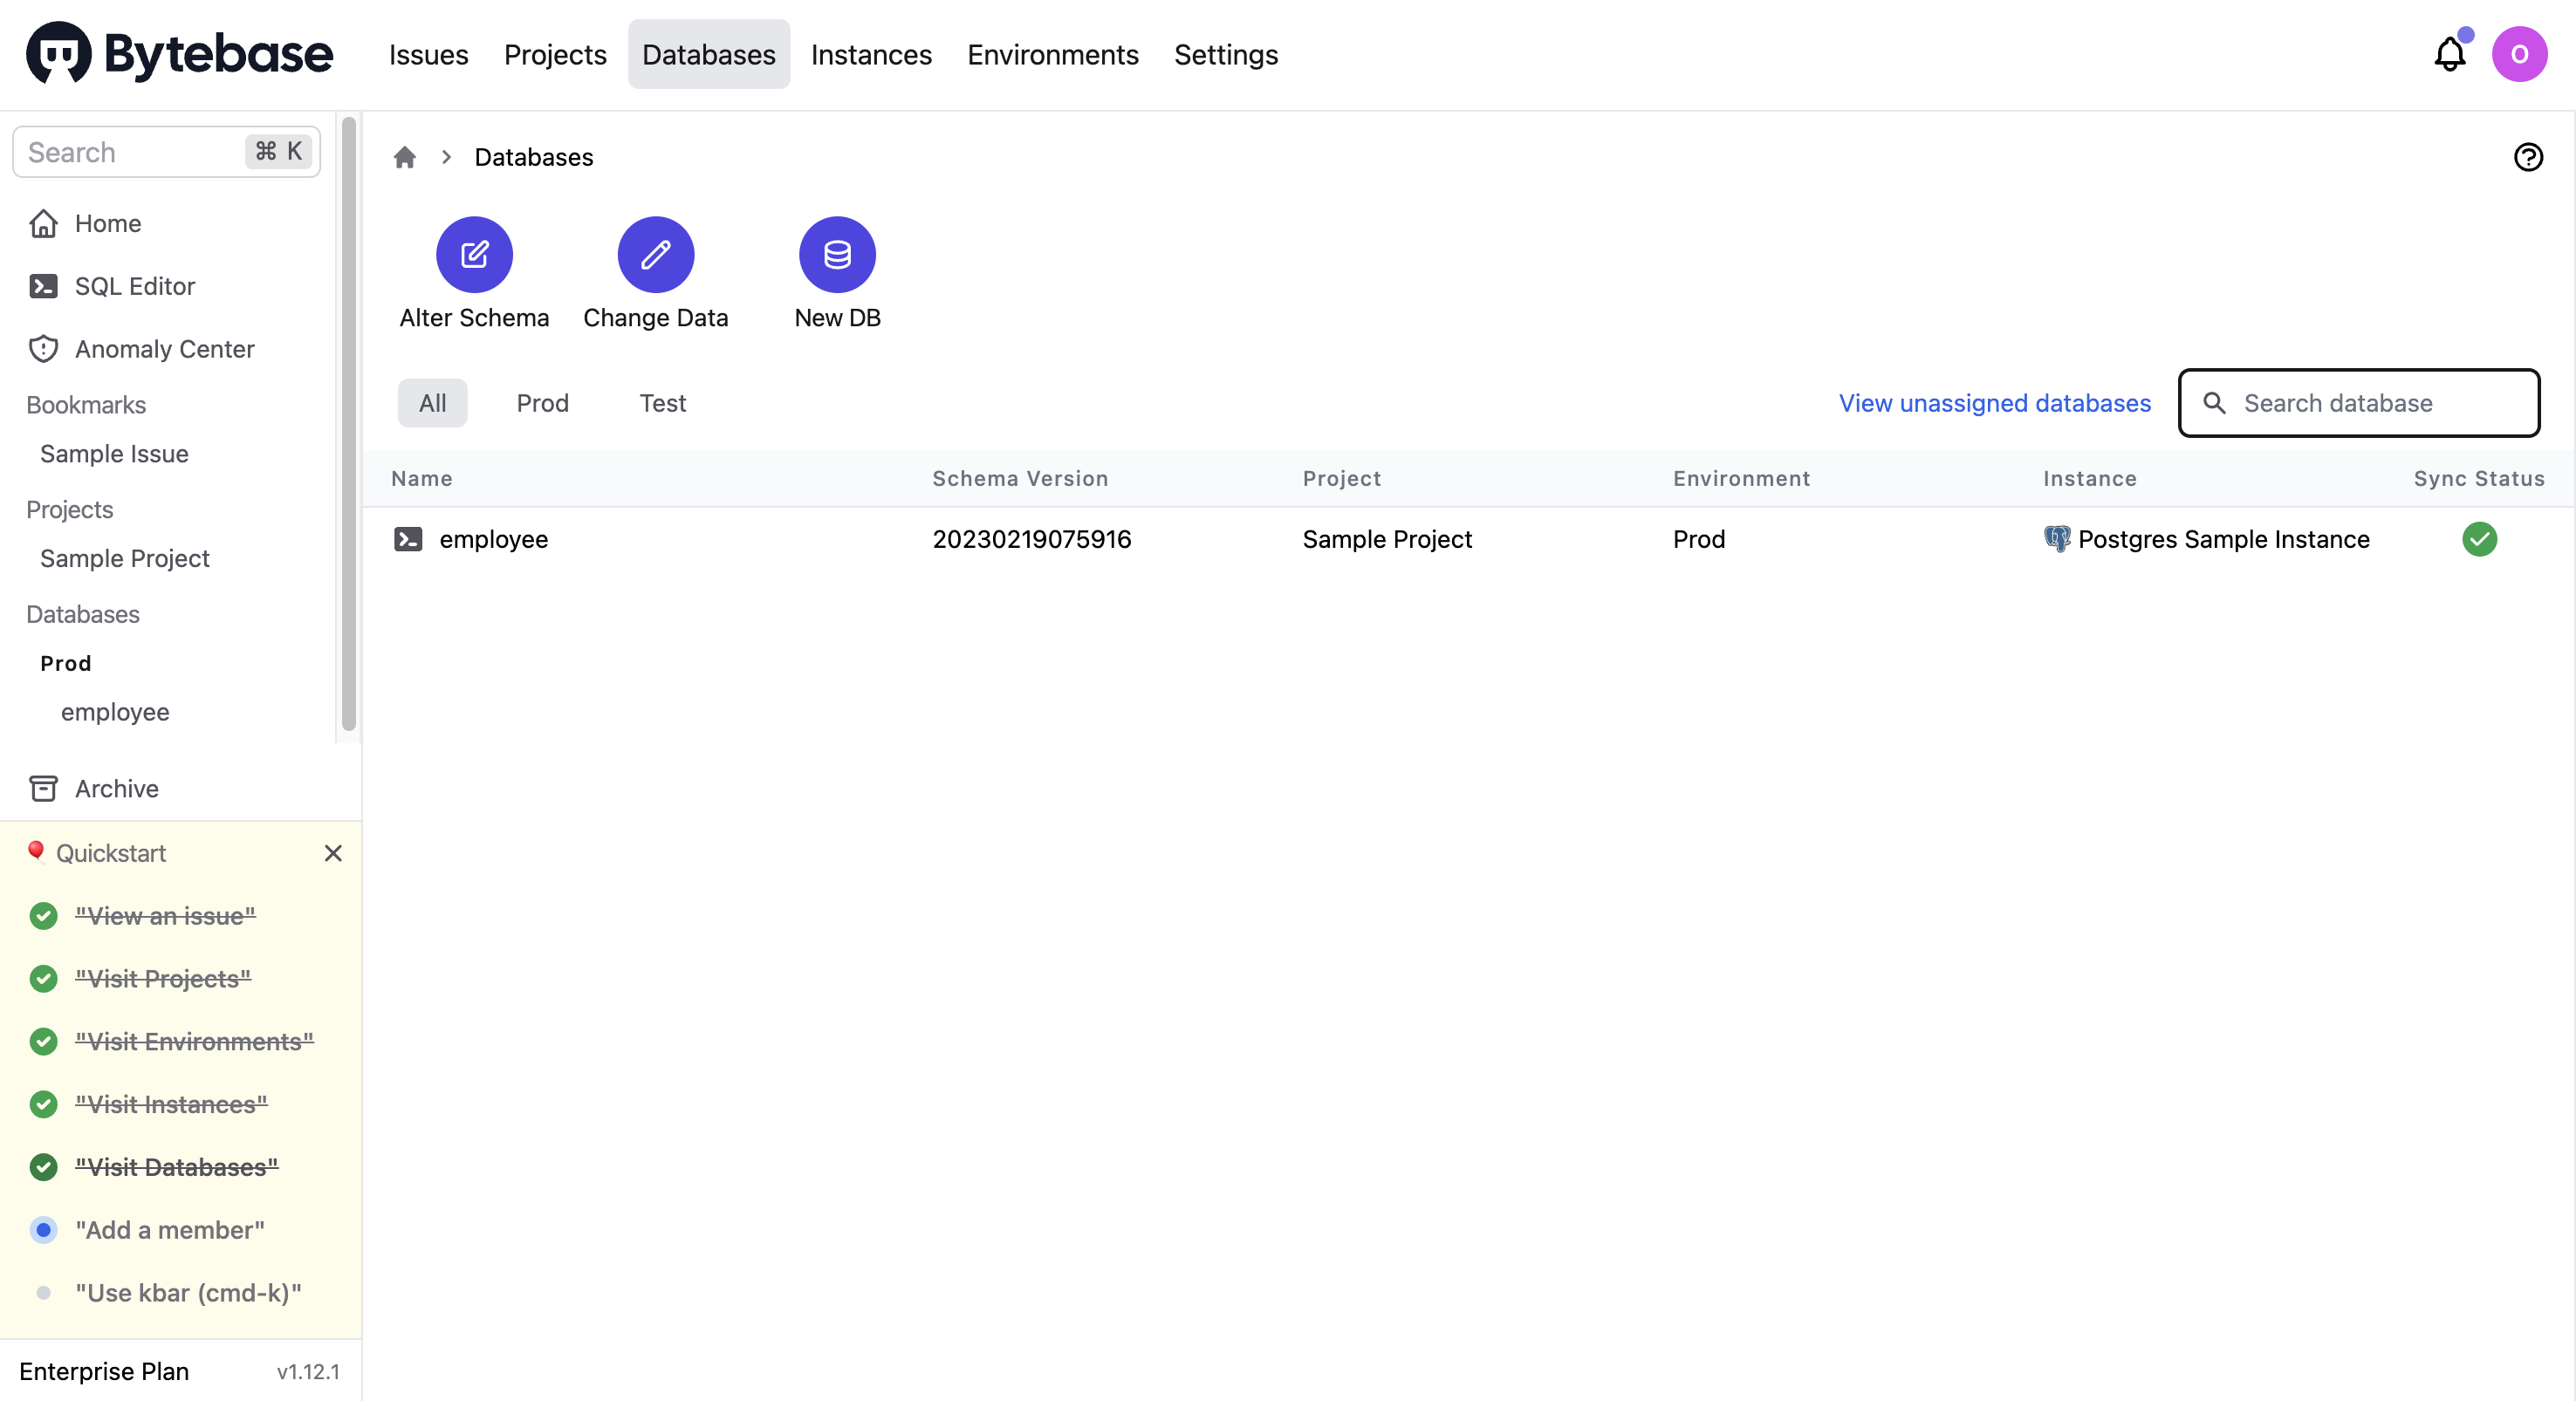
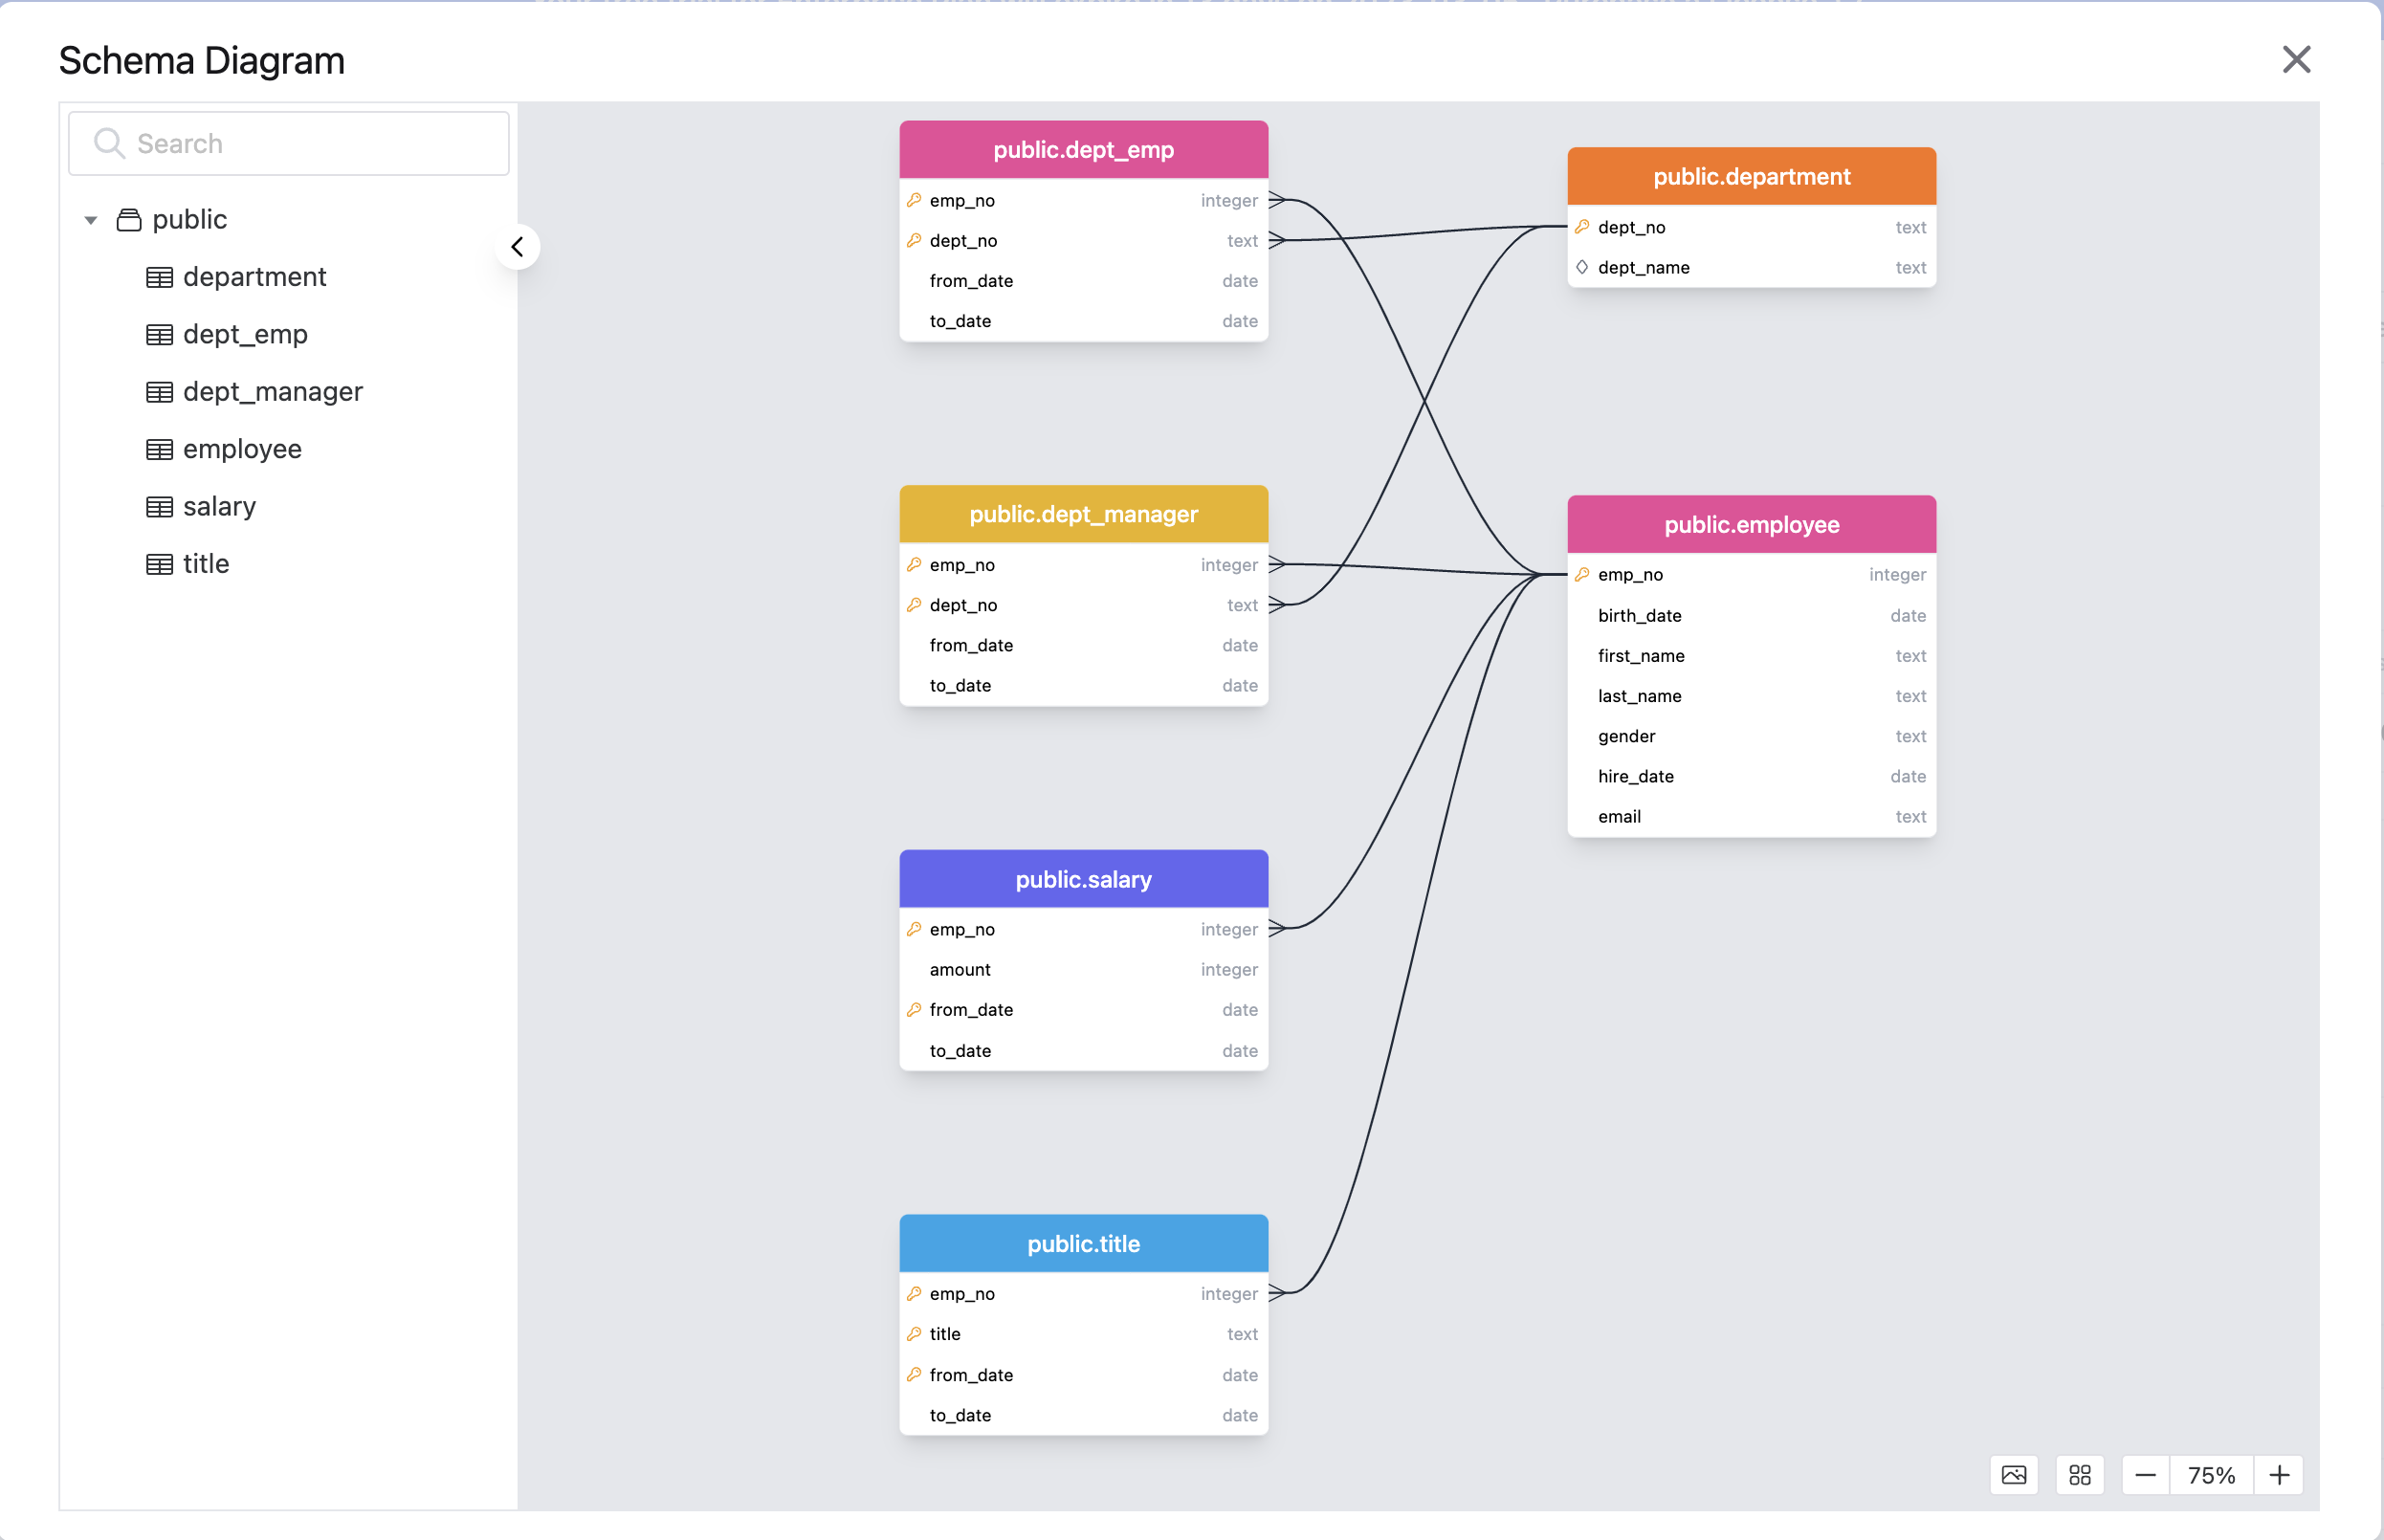
For each database, you can use the Schema Diagram to view the schema or use the SQL Editor to query data.
The following is the schema diagram of the employee database.
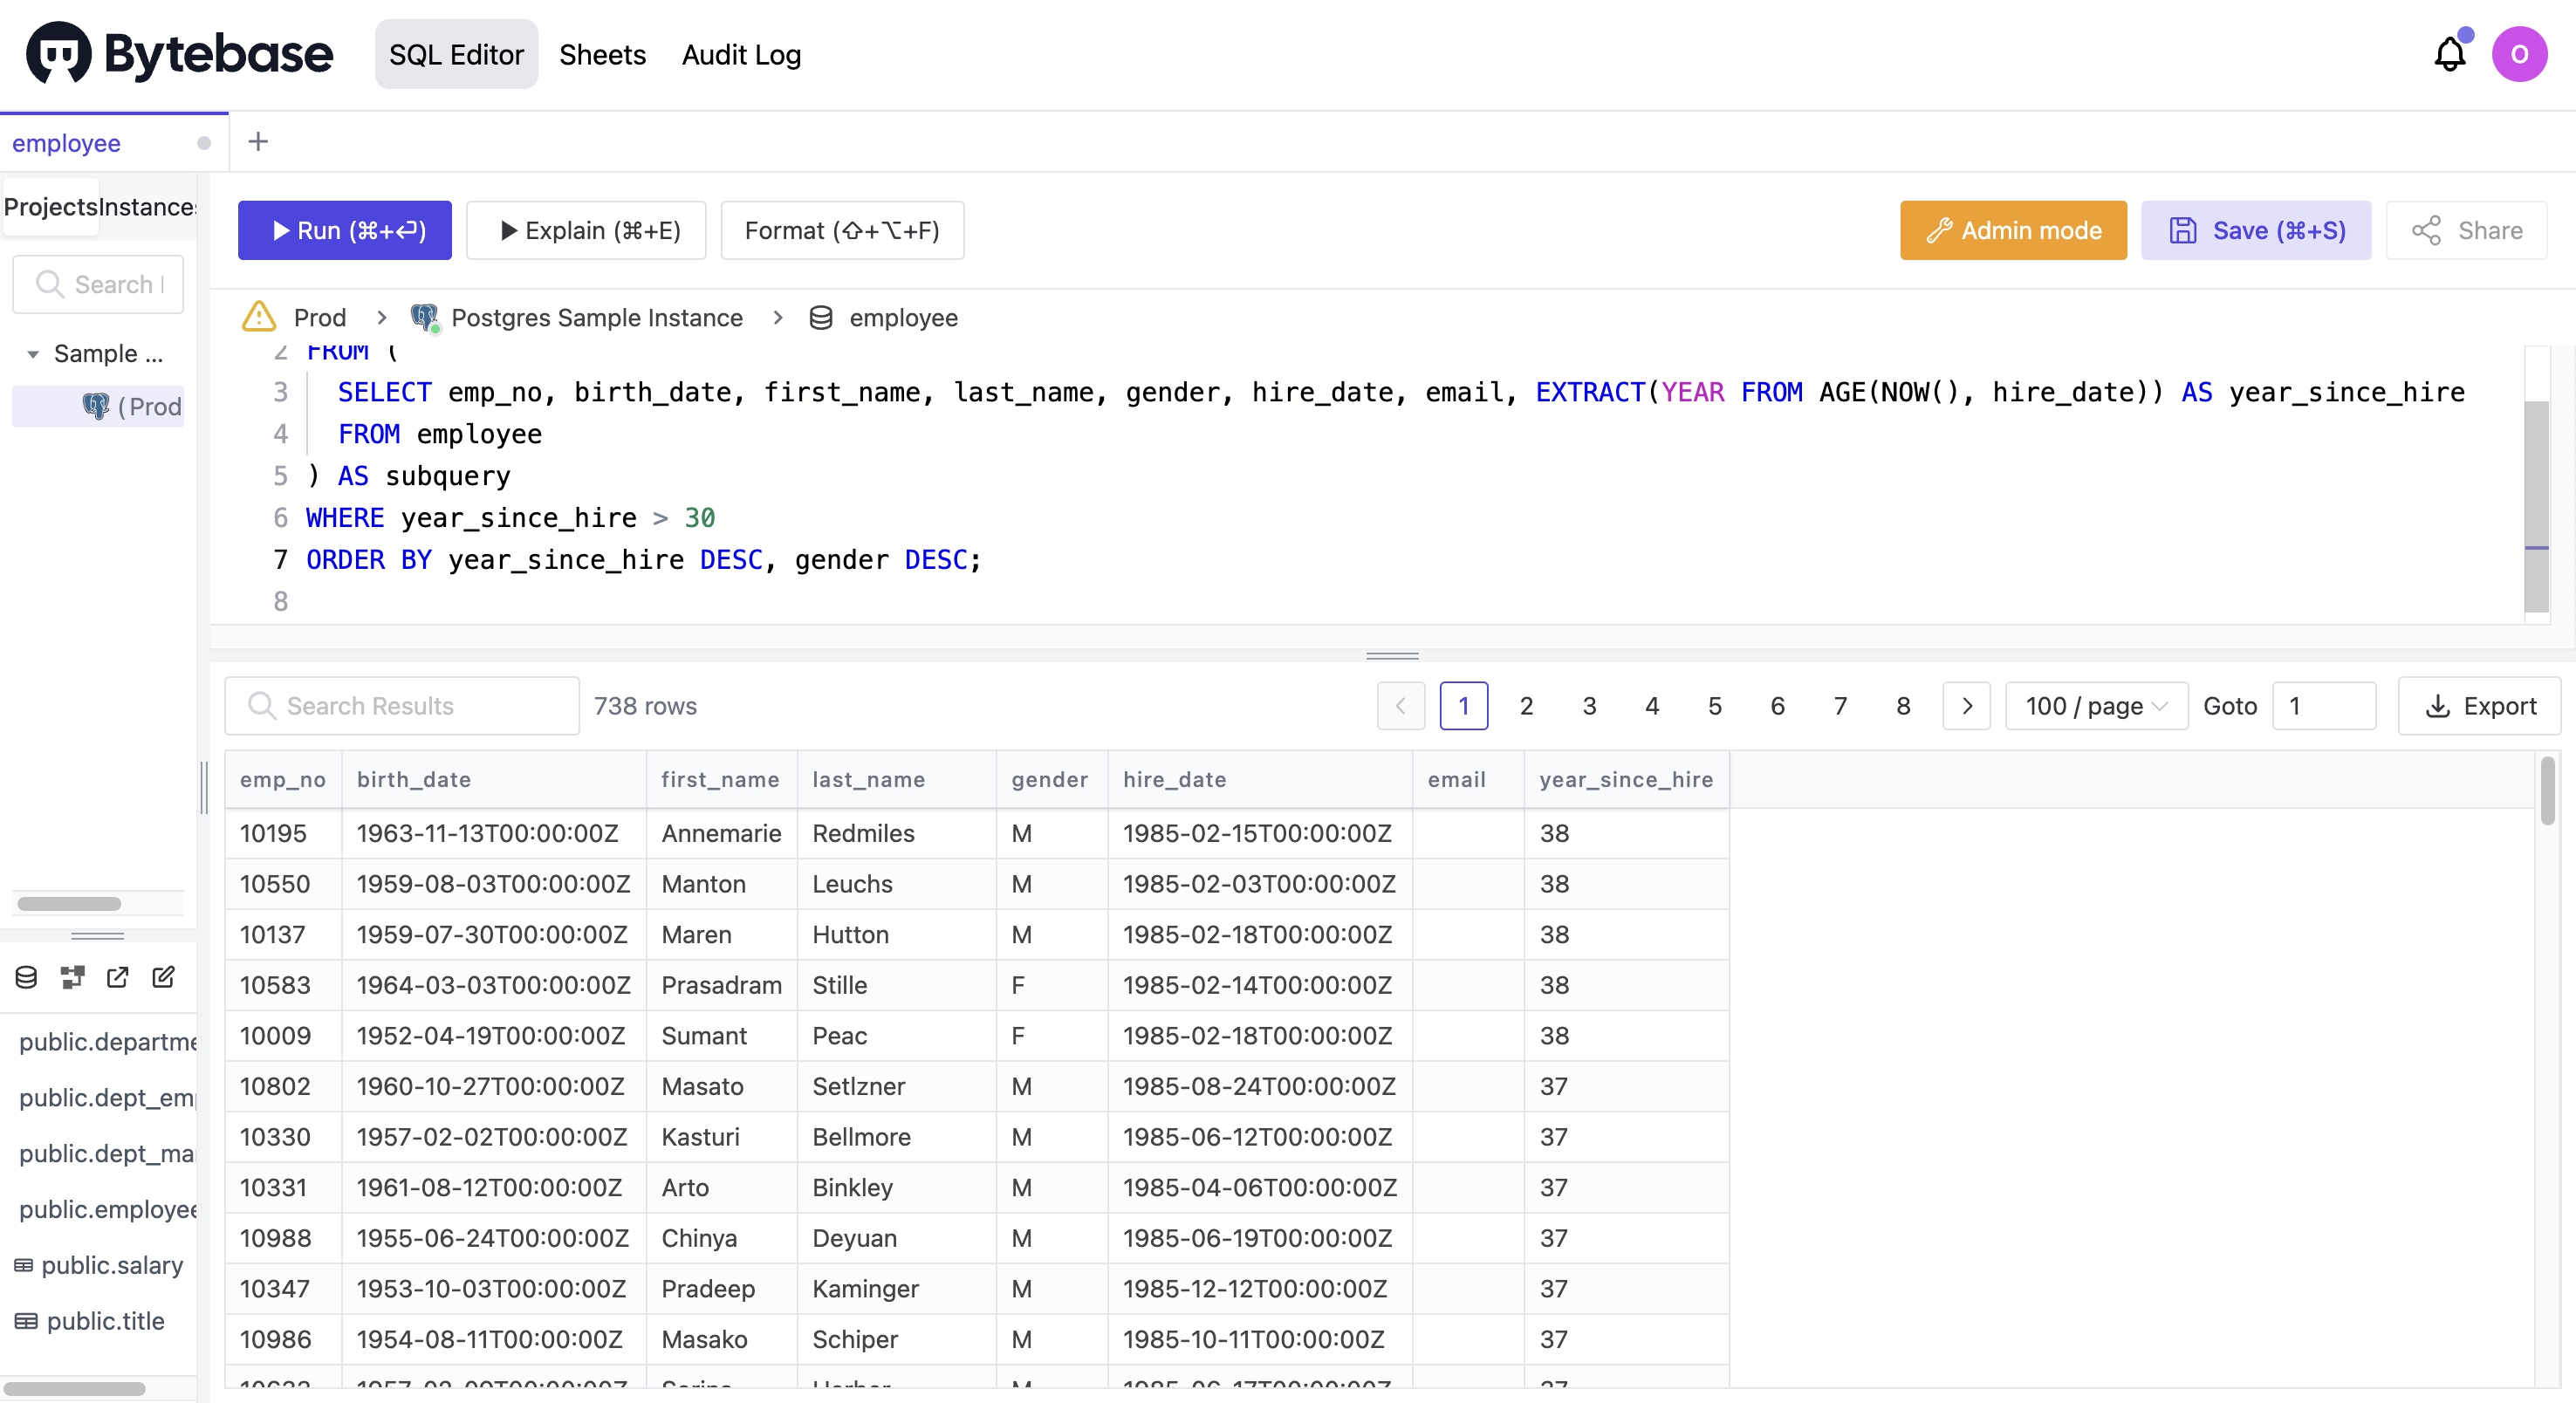
Query data
You can use the SQL Editor to query data. The following example lists employees who have been employed for more than 30 years and sorts the results by their hire date and gender.
Modify schema
To add a new column github_name to the employee table, you can click Alter Schema, select the employee table, and then click Add column.
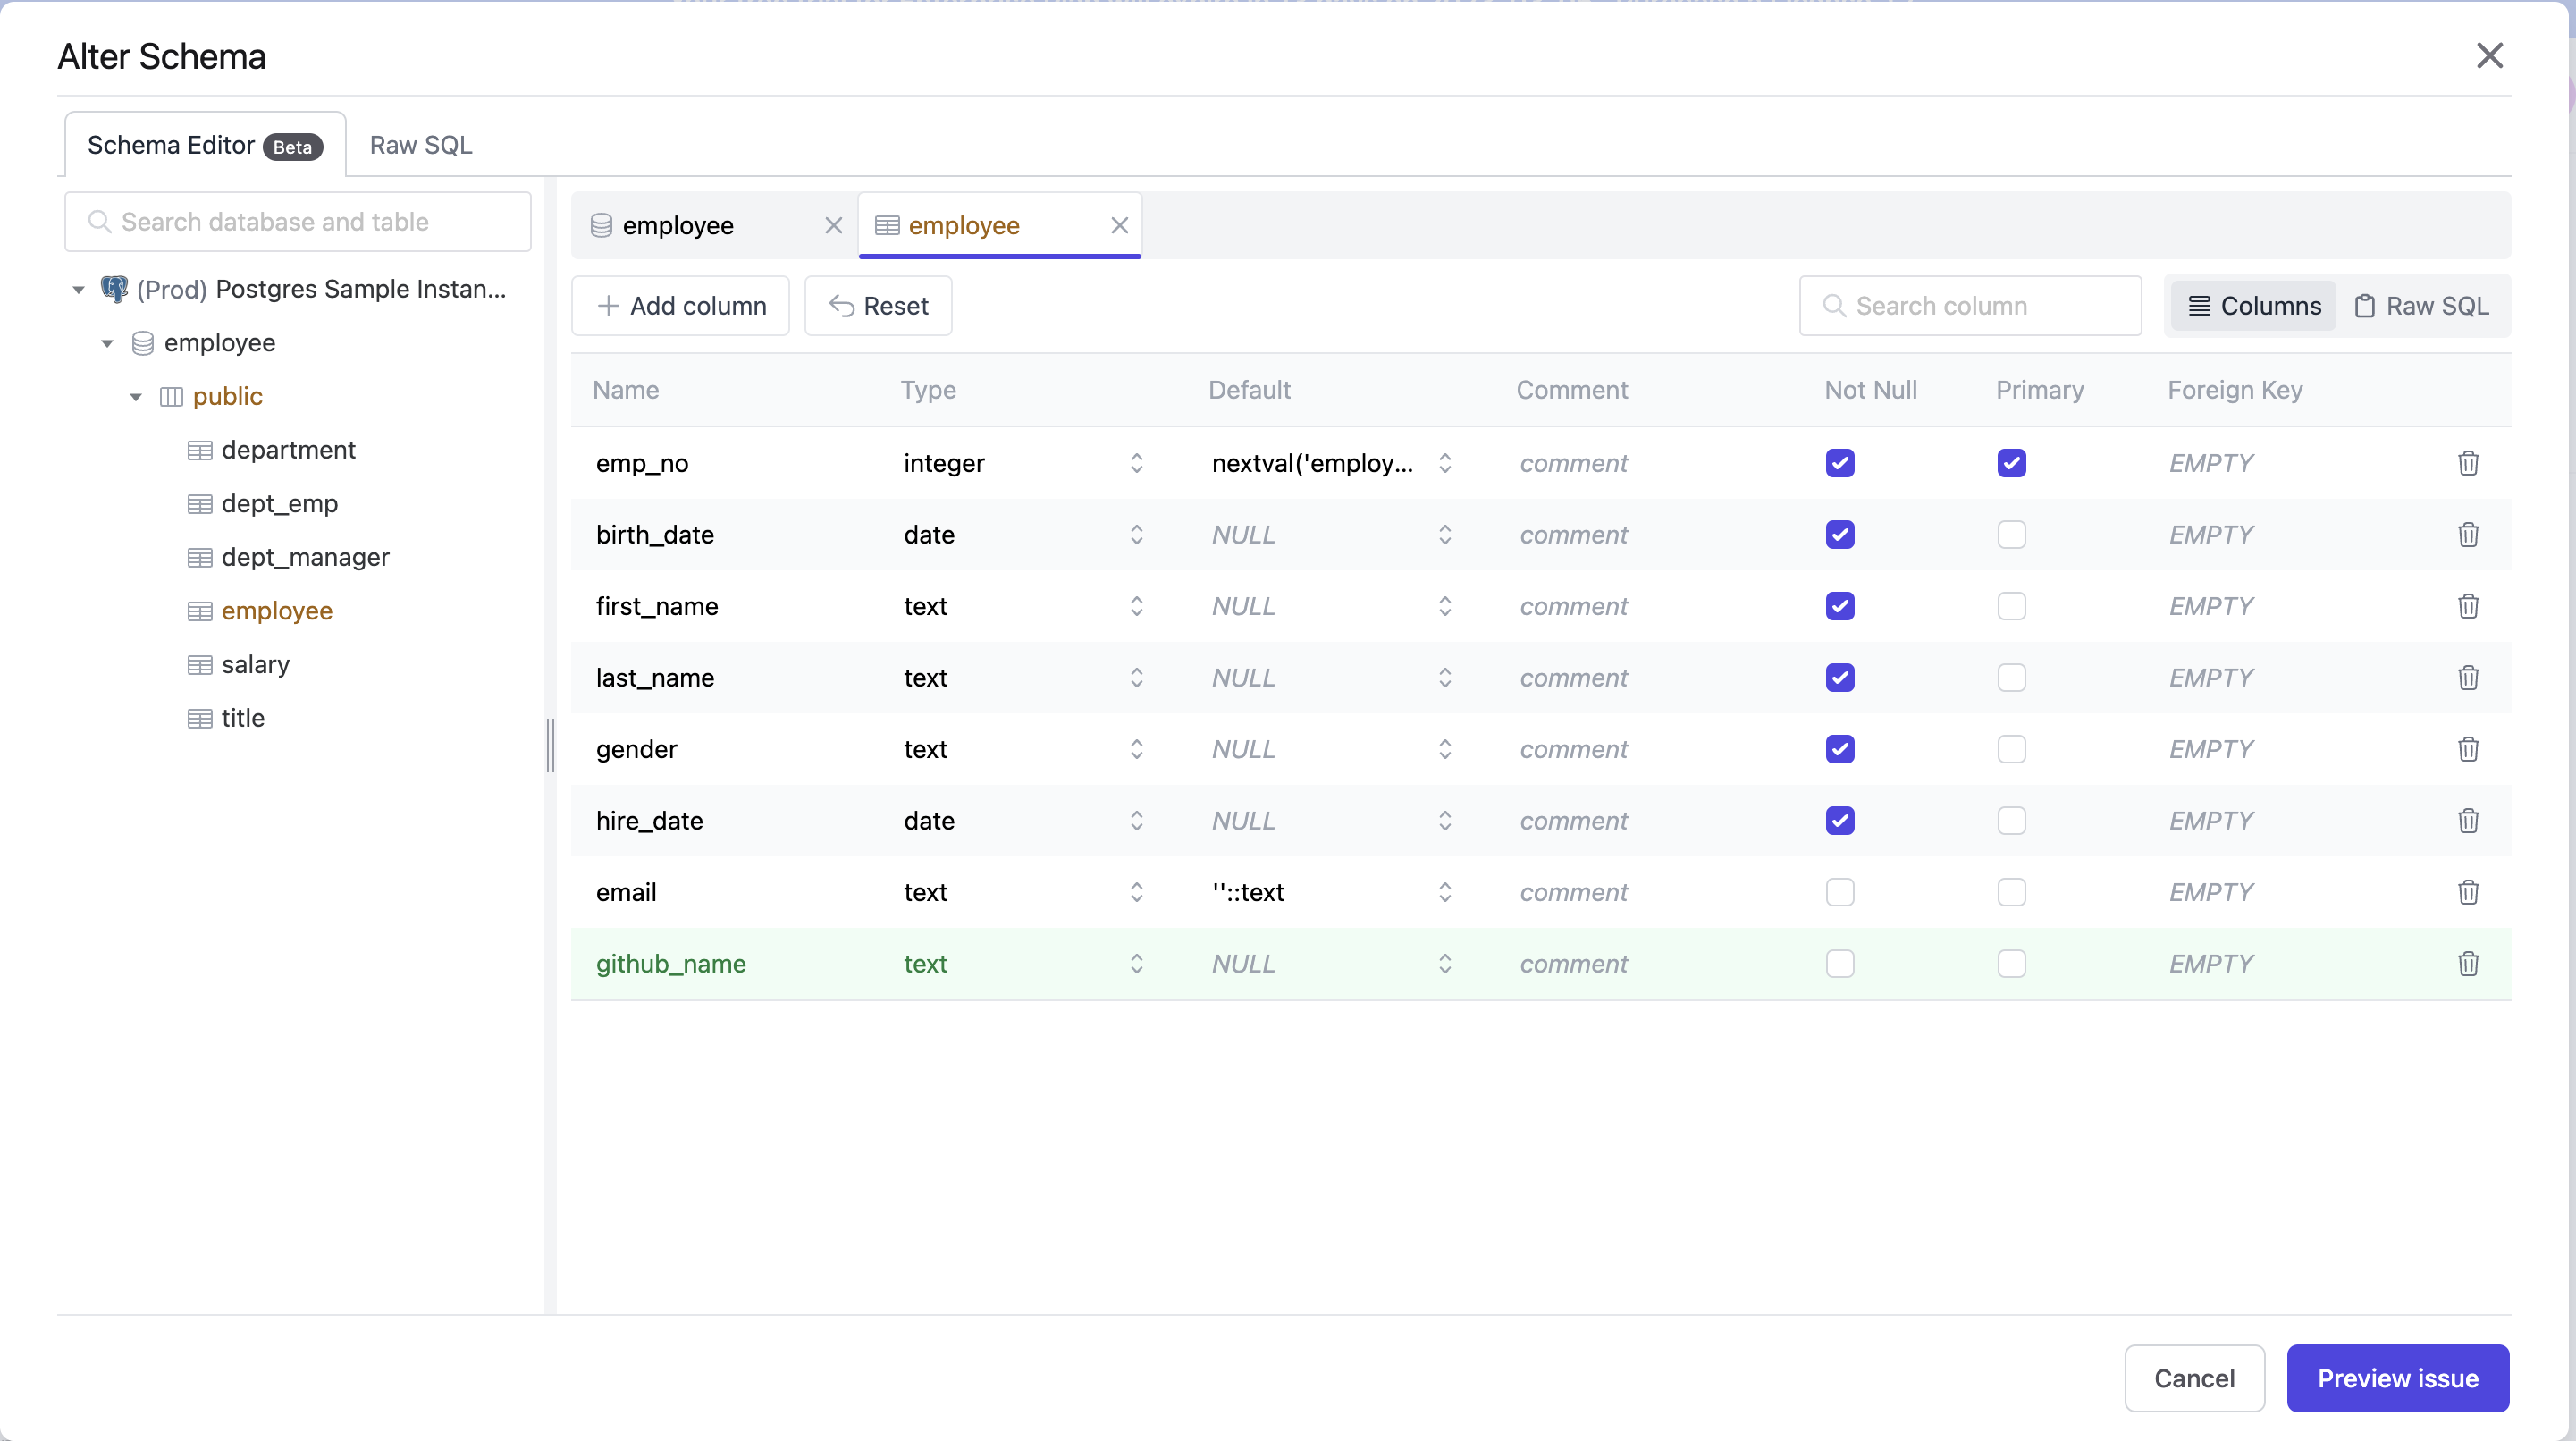
After entering the column name (github_name) and type (text), click Preview issue and the New issue page is displayed with the SQL generated automatically.
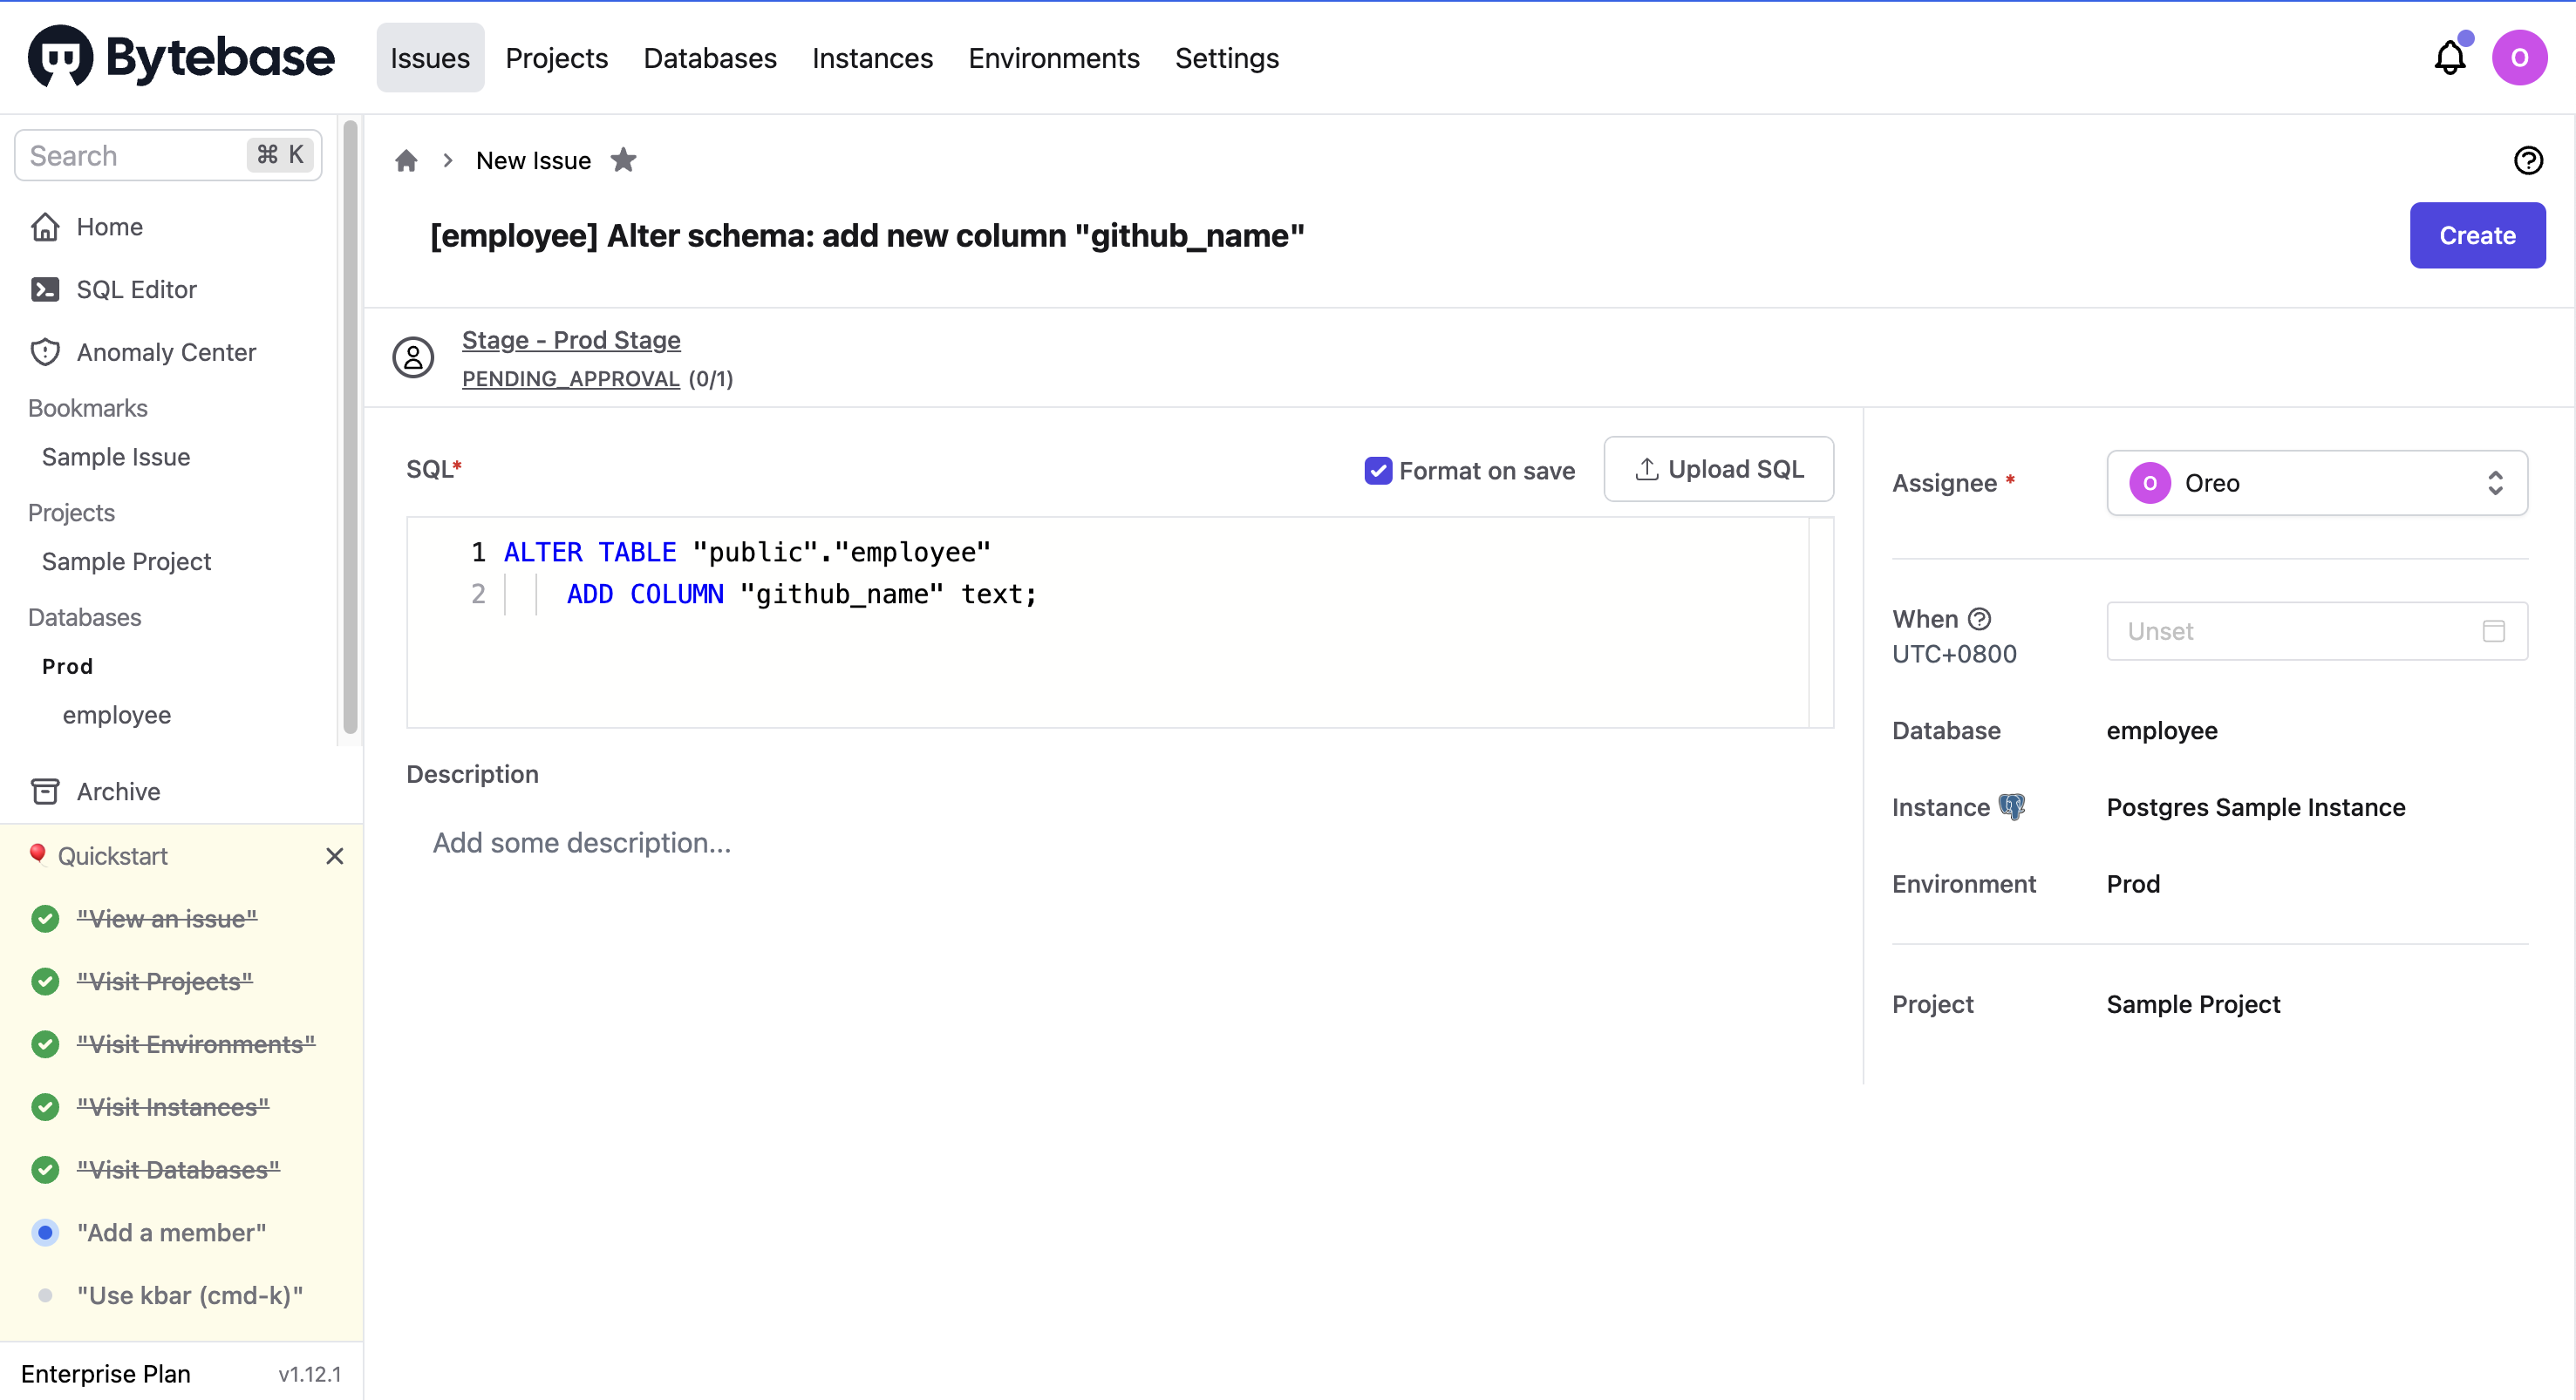
After confirming the schema change, you can click Create and then Approve this change.
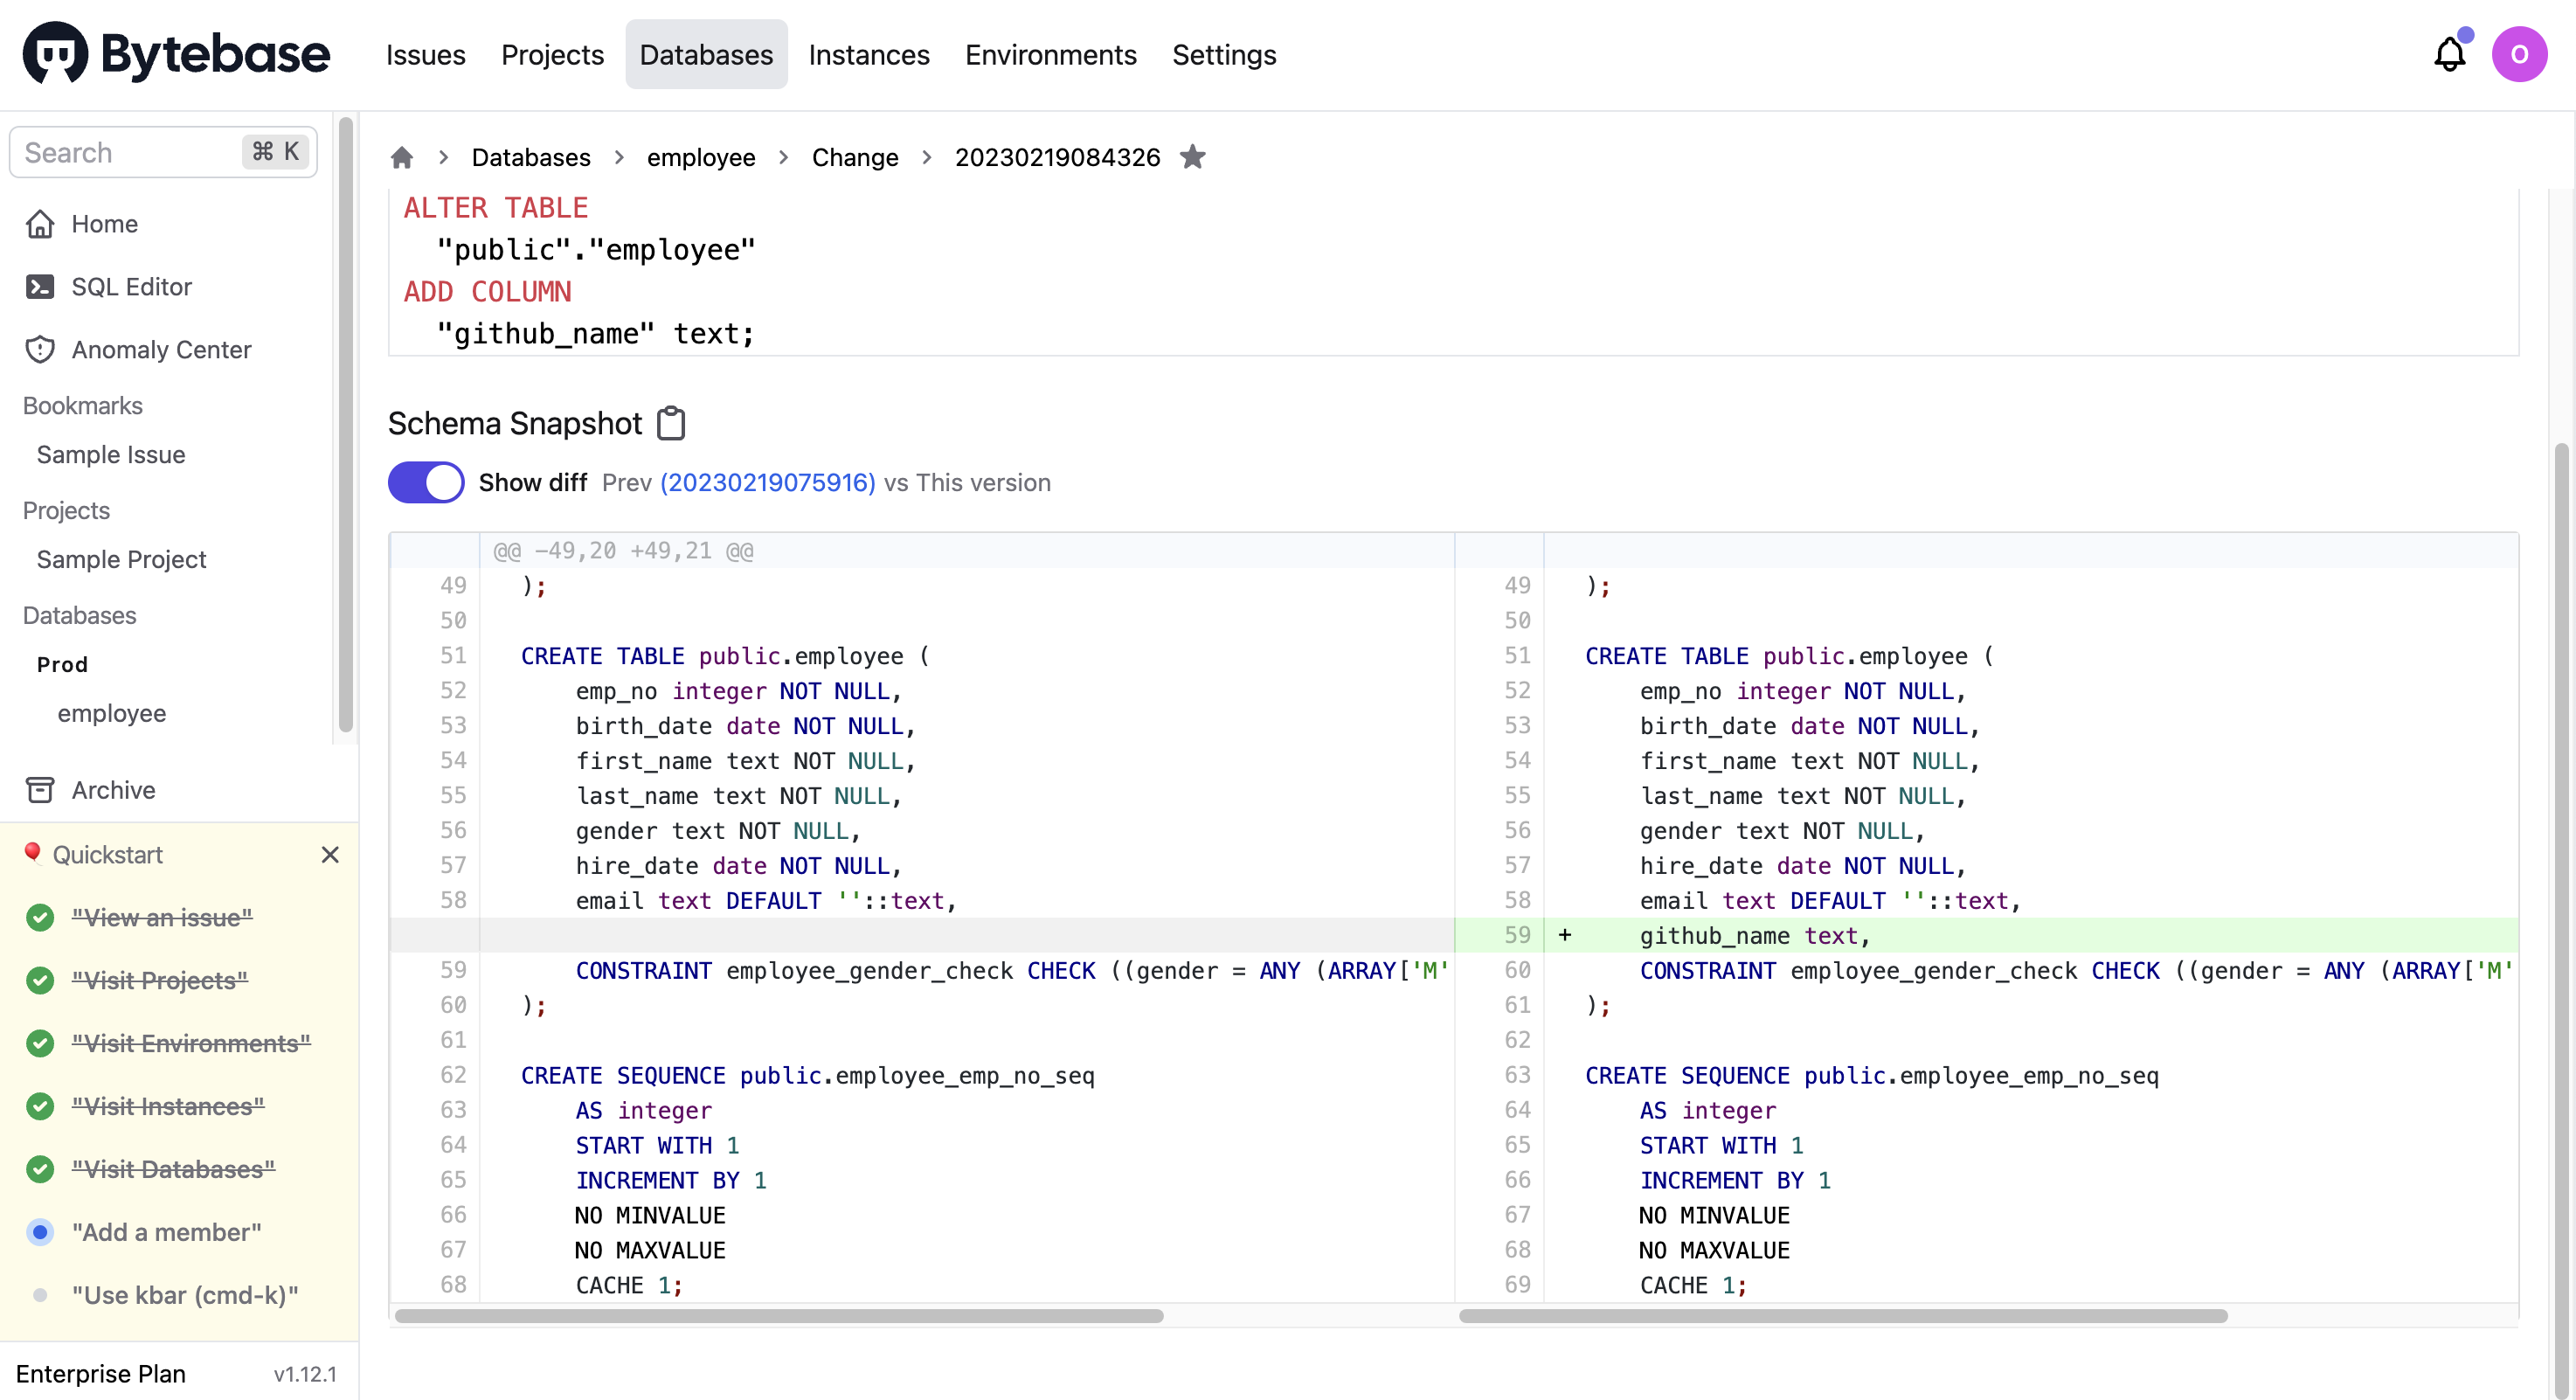
Then, you can view the change details on the Databases > employee > Change page.
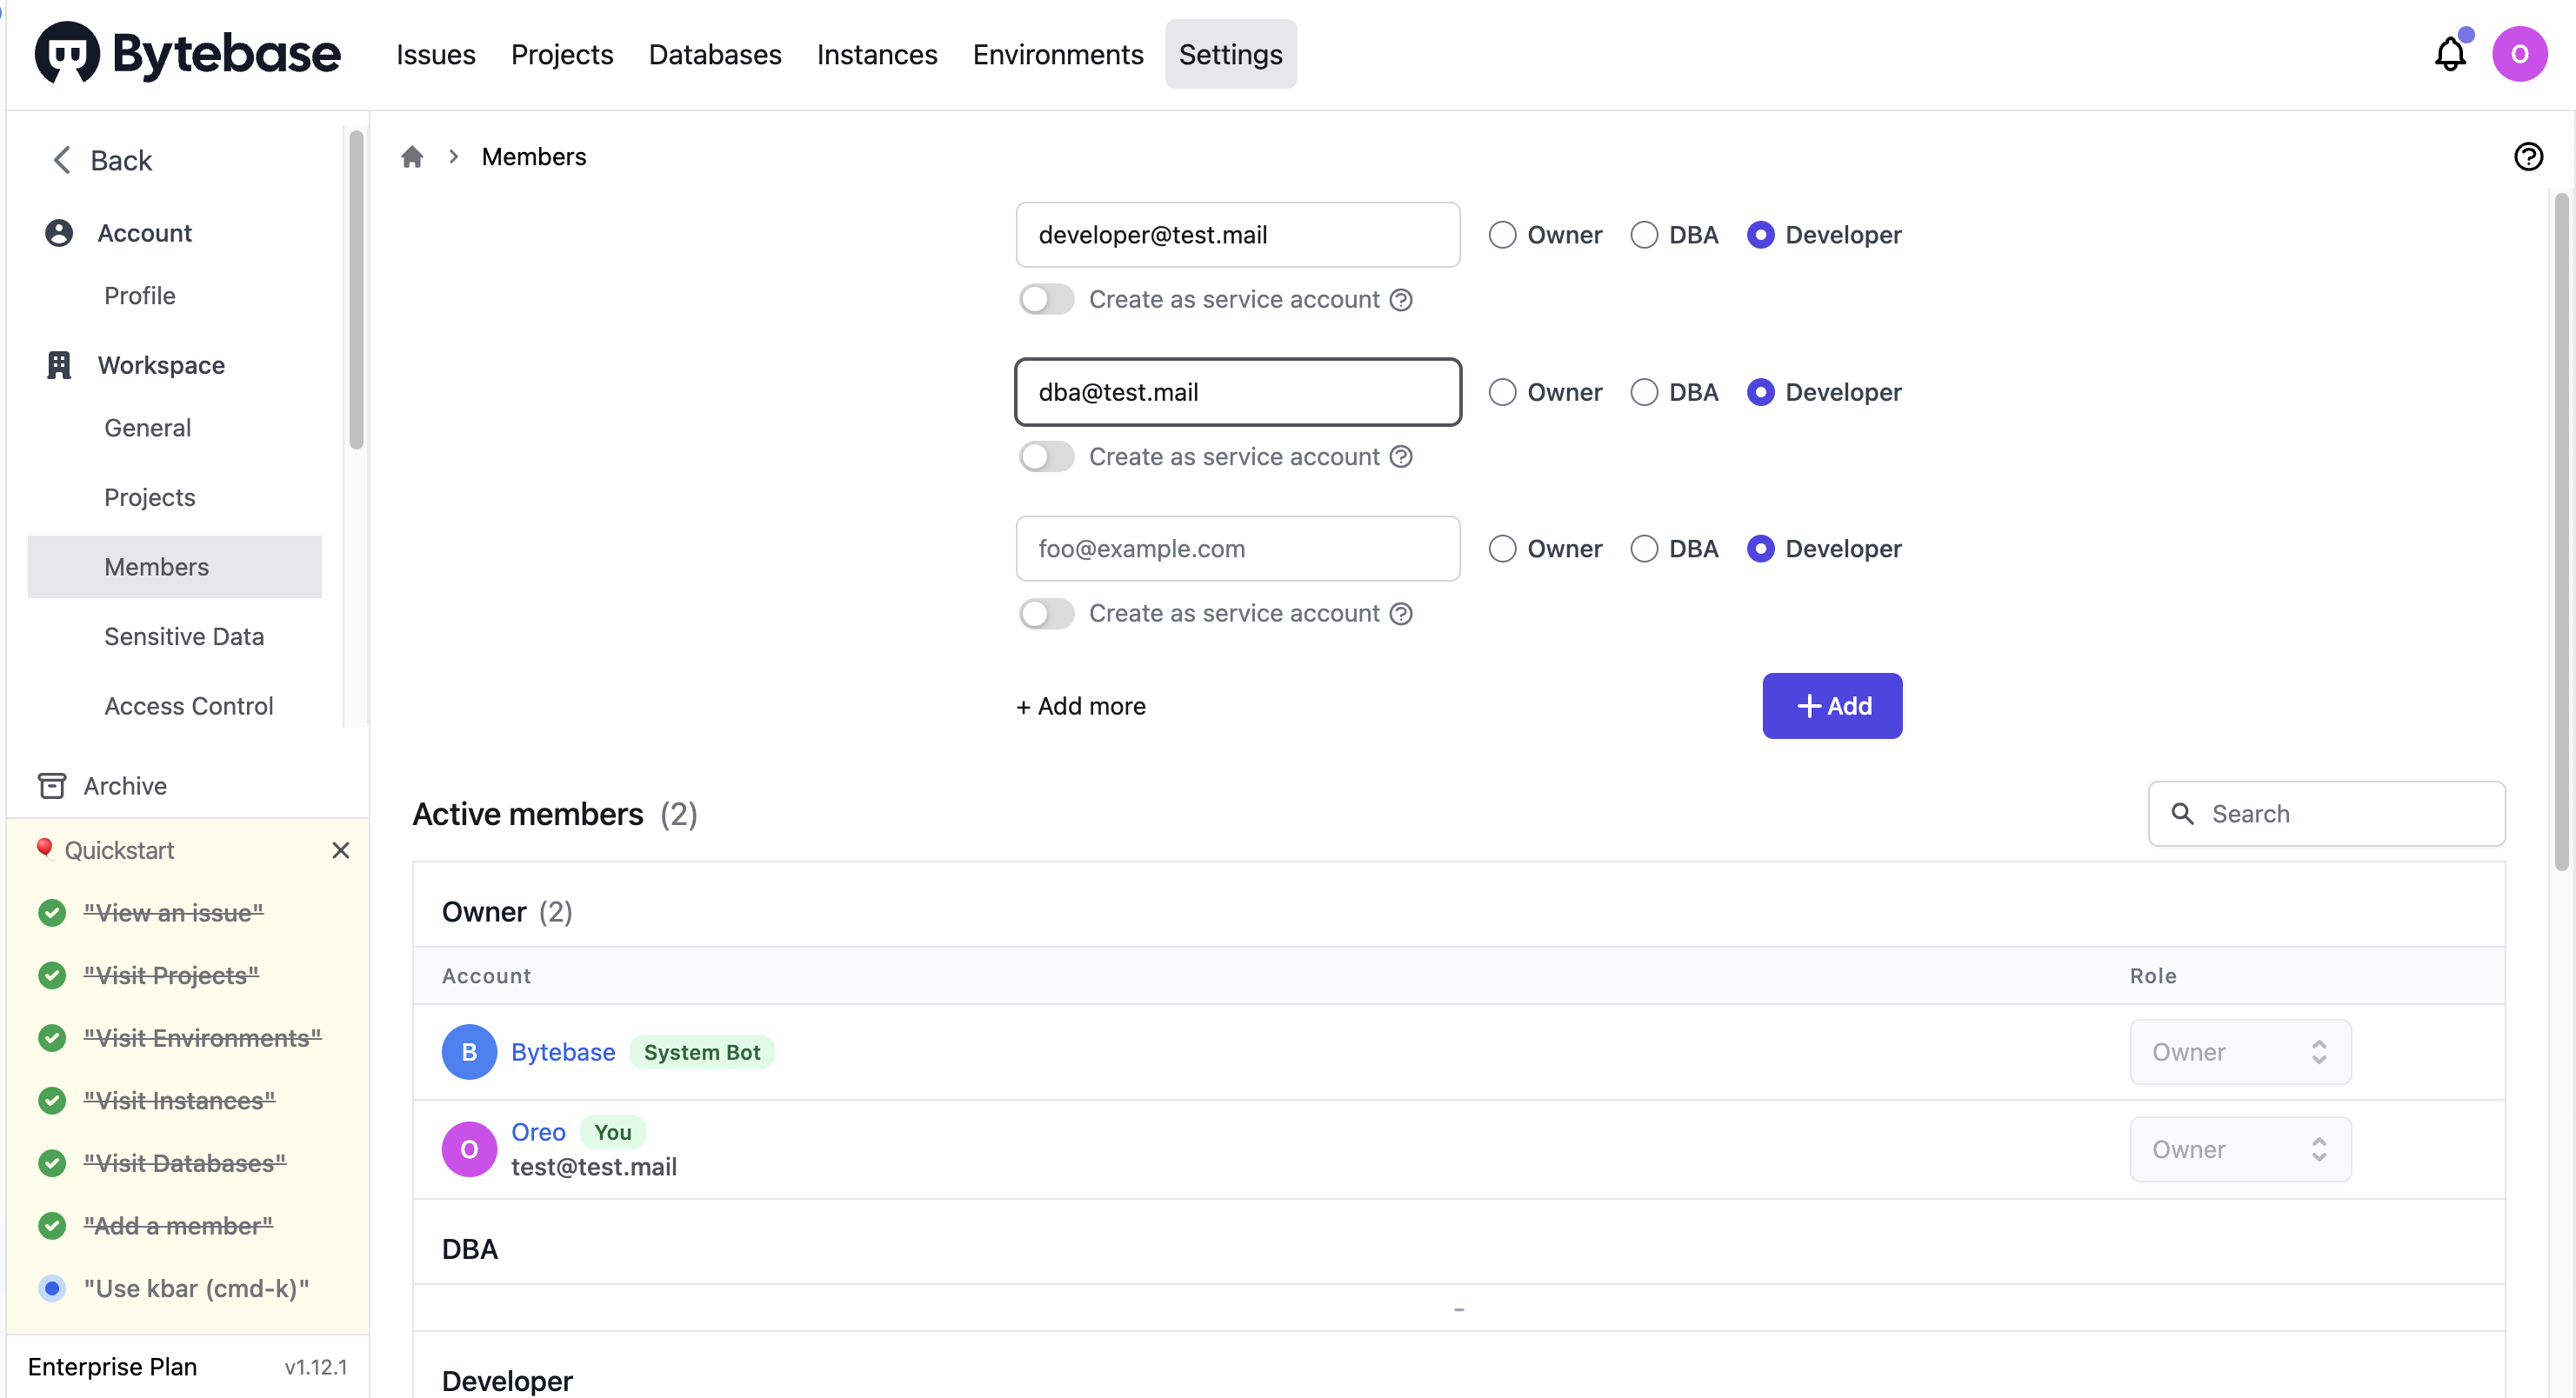
Add a member
On the Settings > Members page, you can add a new member to the project and manage existing members.
Use kbar (cmd-k)
To quickly navigate to the page you want, press Command+K.
Integrate Bytebase with TiDB Cloud
This section describes how to integrate Bytebase with TiDB Cloud.
- Create a TiDB Cloud cluster. For more details, refer to TiDB Cloud Quick Start.
The following uses a Serverless Tier cluster as an example.
-
To create an instance in Bytebase, perform the following steps:
-
Click Instances on the top bar and then click New Instance. The Create Instance page is displayed.
-
Select TiDB as the Instance Type, enter an Instance Name, select the Environment, and enter the Host and Port of your TiDB Cloud cluster.

- Create a new user (
prefix.bytebase) in TiDB Cloud and fill in the Username and Password of the user:
CREATE USER 'prefix.bytebase'@'%' IDENTIFIED BY 'YOUR_DB_PWD';

GRANT ALTER, ALTER ROUTINE, CREATE, CREATE ROUTINE, CREATE VIEW,
DELETE, DROP, EVENT, EXECUTE, INDEX, INSERT, PROCESS, REFERENCES,
SELECT, SHOW DATABASES, SHOW VIEW, TRIGGER, UPDATE, USAGE,
LOCK TABLES, REPLICATION CLIENT, REPLICATION SLAVE
ON *.* to 'prefix.bytebase'@'%';- Configure the SSL connection of TiDB Cloud. For Serverless Tier clusters, use the CA Certificate.
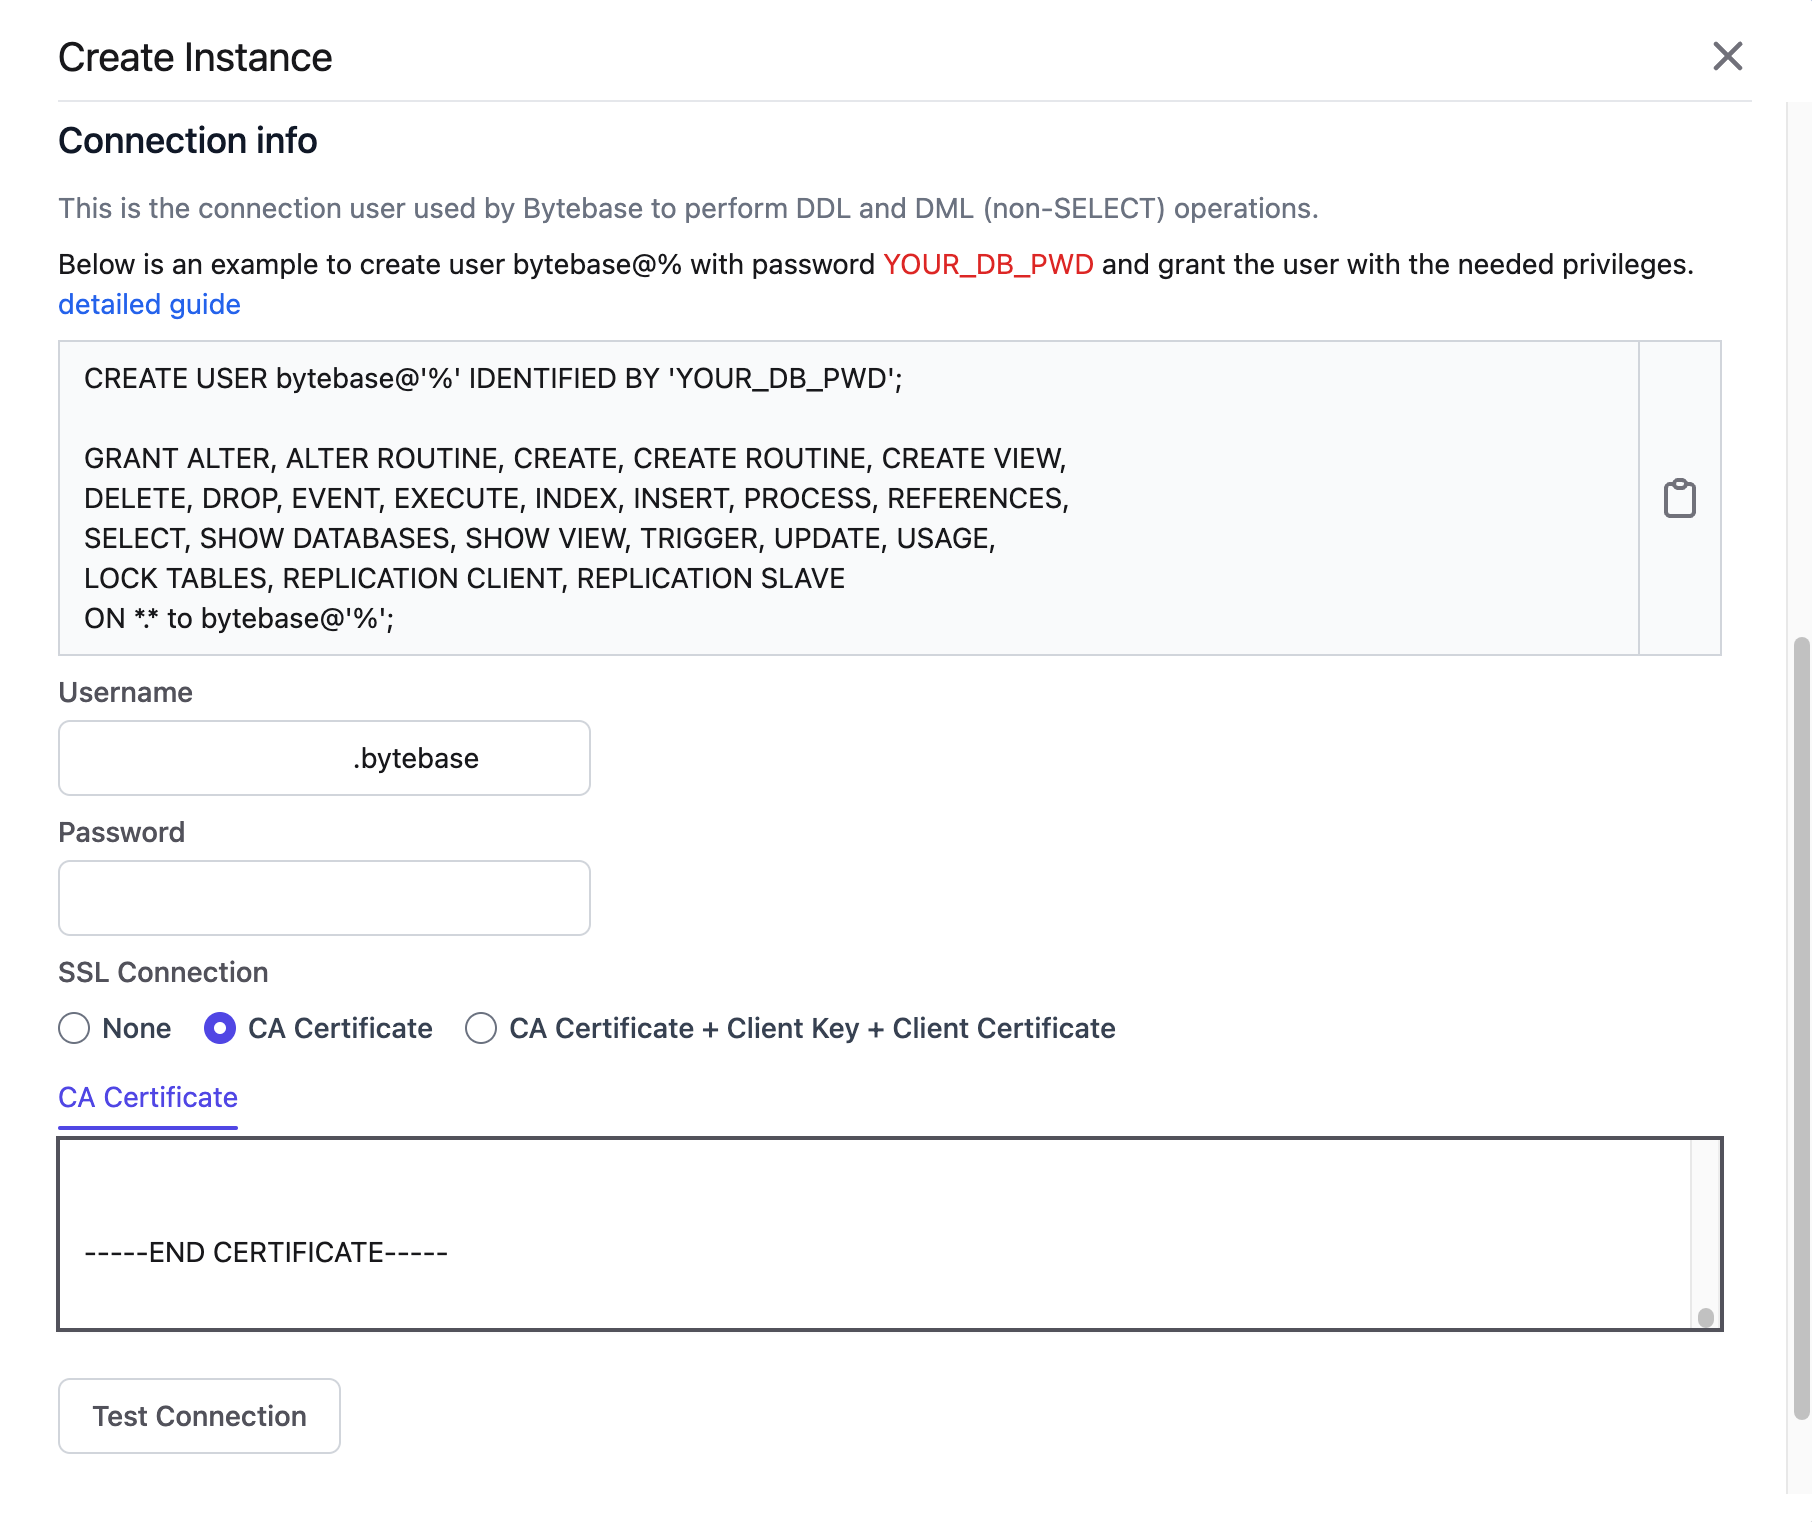
-
Click Test Connection and check the connection status.
-
Once the message
Successfully connected instanceis displayed, click Create.
-
-
Create a new project for TiDB Cloud by performing the following steps:
-
Click Projects on the top bar and then click New Project. The Create Project page is displayed.
-
Enter the Project Name (
TiDB) and Project Key (TIDB), and then click Create. -
Click the newly created project, and then click Transfer in DB. The Transfer in database page is displayed.
-
Select the
gharchive_devdatabase and click Transfer.
-
Personal thoughts
-
Does the Quickstart guide help you get started with Bytebase?
The guide is easy to follow and helps me quickly understand the main concepts and pages of Bytebase. However, I think it would be better if the guide provides step-by-step instructions on how to complete a task, such as creating a new instance, and includes information on what details to pay attention to, such as the details of a project.
-
Do you have a good understanding of the core features of Bytebase after completing these two tasks?
Yes. By completing the two tasks, I am able to use the SQL advisor, schema editor, schema diagram, migration history, and SQL editor features. But I have not yet tried the VCS integration, backup and restore, and other features.
-
Do you encounter any difficulties when deploying Bytebase?
Yes. As Bytebase is only available in x86 architecture, binary translation is required to run it on the M1 chip. However, when I tried to run Bytebase in an Ubuntu 22.04 ARM virtual machine (set up by UTM with Apple Virtualization backend), the container crashed due to a segmentation fault. Strangely, Bytebase runs without any problem in Podman's virtual machine. The crash no longer occurred after I switched the x86 binary interpreter from Rosetta to QEMU. Something is likely incompatible with Rosetta.
-
Does the SQL editor meet your needs?
Yes. The SQL editor meets my needs. It supports syntax highlighting, auto-completion, and anonymize data. It also provides a schema diagram, which helps to understand the database schema.